Feeds:
Posts
Comments

Archive for the ‘pastry’ Category

Kouign Amann

DSC_0049

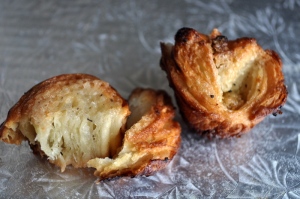
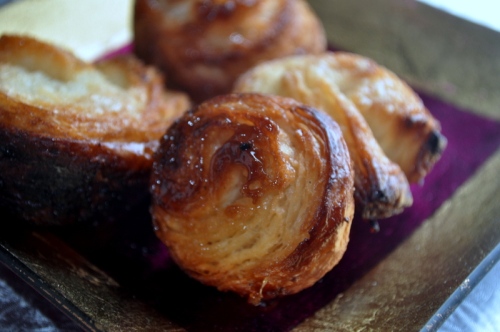
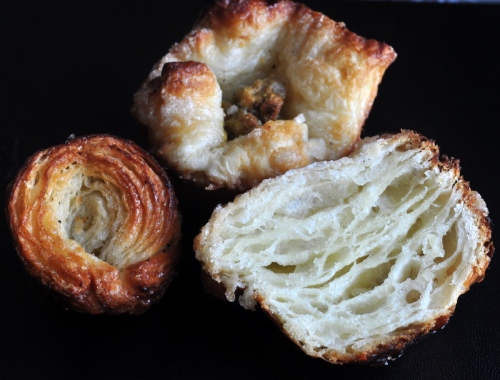
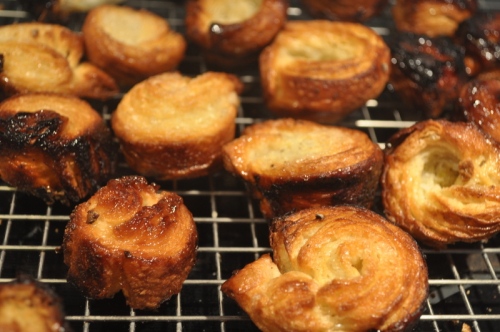
So that 4 mile walk I did this morning? Down the drain after digging into these gorgeous, caramelized morsels of pastry. Can you stop at just one? I dare you. I double dog dare you. Holy cow, these are unbelievable. I am on a sugar high right now and probably on the verge of diabetes (just kidding)….

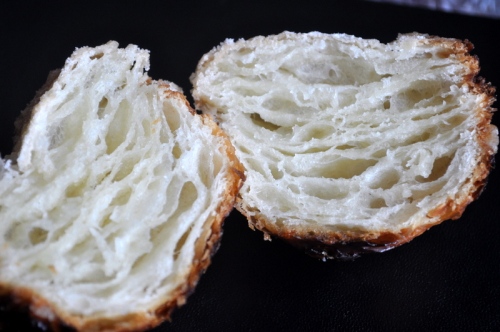
Lien of Notitie van Lien has chosen the French pastry Kouign amann (pronounced “queen a-mahn”) and it  hails from Brittany, France. It’s kind of like a croissant but also  a palmier, with layer after layer of buttery, flaky pastry on the inside, yet caramelized with sugar on the outside. Pure heaven.

DSC_0063

It’s the 7 year anniversary for the Bread Baking Babes and as a tag along buddy I wanted to share in their celebration.BBBuddy Badge Feb 15

Since I have been quite lazy about posting anything I really felt it was about time I got back on the bandwagon and here is the perfect opportunity. . Even though, I have been quiet as a mouse I still have been baking along with them.

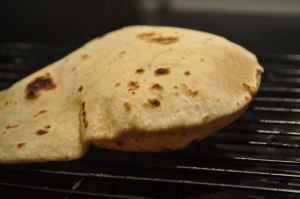
Last month was chapatis

DSC_2441


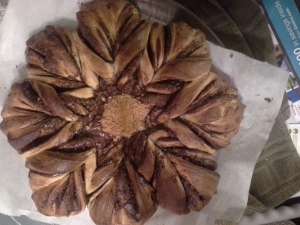
December was a yummy nutella bread ( It was so much fun I made it twice)

nutella

So I start getting my ingredients together and get the scale out. I weighed the butter and realize that my butter is underweight. I weigh it again. A pound of butter should be 452 grams and I am coming up at 260. What???  I am ready to write the butter company telling them they ripped me off when my husband asks about my digital scale. Mmmmm…. I just changed the batteries so it can’t be that. so I put 8 oz of water on the scale and sure enough…4 1/2 oz. I have never heard of a digital scale going wacko like this, I figured it would just stop one day. So, no scale for now. Oh well…

DSC_0070

And now onto this lovely, layered treat. It is a laminated dough, which just means that butter (and lots of it) is incorporated into the dough through layers so when it goes into the hot oven the steam from the butter puffs up the dough to amazing heights. For some strange reason, I adore making laminated dough. The first time I made puff pastry though, it was not so pretty, not to mention a waste of butter. A few more tries, and a few more pounds of butter, and now I love it.The multi day process of making croissants is actually fun and I look forward to making them. By comparison, these were a breeze to make. I still made them over two days but that was just because it fit better into my schedule. That is the beauty of laminated dough. You must let it rest for at least 30 minutes between each “fold”. Fear not, you can easily make and enjoy these in one day though

This is a great recipe to try for your first go at a laminated dough and if you are anything like me, it won’t be your last.DSC_0056

Now word on butter. I always buy unsalted butter. I love salt, but I like to add my own. I always keep a few pounds on hand tucked away in the freezer. For laminated dough it is recommended that you use good European style butter. It has a higher butterfat content and less moisture. It is also very expensive. I admit I do not spend the money on it. Instead I soften my butter that is needed for the recipe and cream in some flour. For this recipe I used about 3 tablespoons.

For laminated dough’s you also need a “butter block”. This is just butter formed into a square so that it fits into the center  of the dough, which is then wrapped around it and rolled out. My foolproof  way is to line a square cake tin and line it with cling wrap, overhanging it on the sides. I then take my softened flour butter (see above) and press it into a plastic lined square pan, using the overhang as a shield between my hands and the butter and making an even surface. this now gets popped back into the fridge to chill until needed. So easy and convenient. For this recipe I used a 6 inch cake pan.

Since Thursday was national pistachio day, I inserted some pistachio paste into the center of some of them. I also upped the sugar by using some Belgium sugar in the final fold.

BAKE ON!

Equipment and preparation: for this recipe you will need a 12-cup muffin tin and a freestanding mixer fitted with a dough hook. I made 6 large ones using my muffin tin and 18 petit ones using a mini muffin tin. It was for portion control. It didn’t work…

KOUIGN AMANN

1-2 hours preparation time
30 mins to 1 hour cooking time
300-340 g strong plain flour (I used 2 1/2 cups unbleached AP flour)
5 g fast-action yeast (1 1/2 tsp SAF gold)
3/4 tsp salt
200 ml  warm water (roughly 3/4 cup)
25 g unsalted butter, melted (2 tablespoons)
250 g cold unsalted butter, in a block (1/2 pound)
100 g caster sugar for sprinkling on the dough (the final fold just before rolling it out and after it’s been rolled out – not between the other layers), plus extra for sprinkling on top (1/2 cup)

Put the flour (start with 300 g) into the bowl of a freestanding mixer fitted with a dough hook. Add the yeast to one side of the bowl and the salt to the other. Add the water and melted butter and mix on a slow speed for two minutes, then on a medium speed for six minutes. Add a little extra flour if the dough is too sticky. The dough should be soft but not sticky (so don’t add too much).

 Tip the dough onto a lightly floured work surface and shape into a ball. Put into a lightly oiled bowl. Cover with cling film and leave to rise for one hour. Prepare your butter block (6×6 inch square) and chill until needed.
DSC_0031
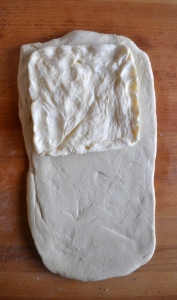
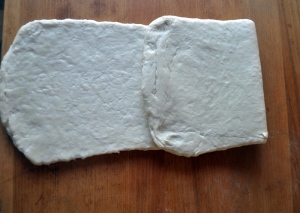
 On a lightly floured surface, roll out the dough to a measure 7 x 14 inches. Place the butter at one end leaving about 1 inch at the edge and then fold the  other half of the dough over it. Pinch the edges firmly to seal in and encase the butter block.  I find this much easier than the standard “envelope” method.DSC_0033
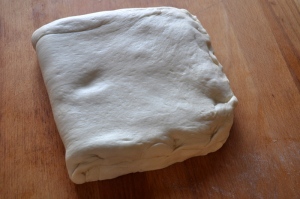
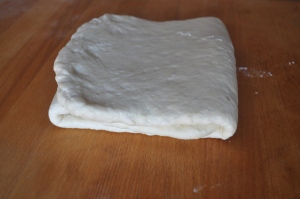
 Roll the dough into a 6 x 18 inch rectangle. Fold the bottom third of dough up over the middle, then fold the top third of the dough over. You will now have a sandwich of three layers of butter and three layers of dough. Wrap in cling film and place in the fridge for 30 minutes. This completes one turn.
DSC_0035           DSC_0036
Repeat this process twice more, so you have completed a total of three turns, chilling the dough for 30 minutes between turns. On every turn rotate the dough before you begin rolling it out. In other words, if you end a fold with the two sides seams horizontal, then after the 30 minute rest when you begin rolling again the two sides seams should now be vertical.
DSC_0037

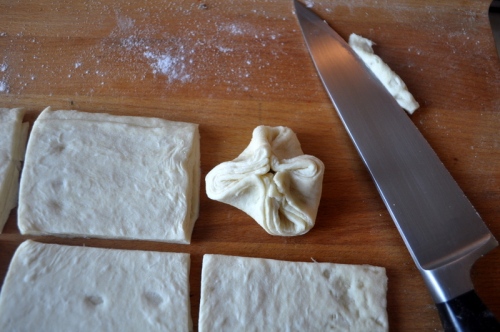
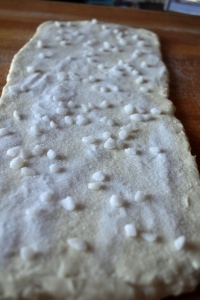
Roll the dough into a rectangle as before. Sprinkle the dough with 1/4 cup  sugar and  fold into thirds again. Working quickly, roll the dough into a large 12 x 16 inch rectangle. Sprinkle the dough with the remaining 1/4 cup  sugar and cut the dough into 12 squares.DSC_0040

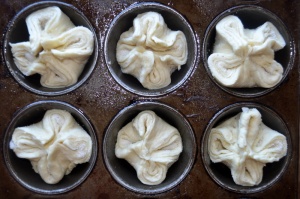
Grease a 12-cup muffin tin well with oil. Gather the dough squares up by their four corners and place in the muffin tins, pulling the four corners towards the centre of the muffin tin, so that it gathers up like a four-leaf clover. Press these corners well together, they can open up when unattached to each other (as mine did) Sprinkle with some more sugar and leave to rise (room temperature), covered with a clean tea towel, for 30 minutes until
slightly puffed up.DSC_0042
 Preheat oven to 425 F.
Bake the pastries for about 20-25 minutes, or until golden-brown. Cover with foil halfway through if beginning to brown too much (and they will). Remove from the oven and leave to cool for a couple of minutes before turning out onto a wire rack. Be careful not to burn  yourself on the caramelized sugar, but don’t leave them to cool for too long, or the caramelized sugar will harden and they will be stuck in the tin. Serve warm or cold. Warm is best!
DSC_0046
If you don’t want to eat them all in want go (of just if you want to, but shouldn’t), bag and freeze them.  Before you eat them: Defrost them and place them in a warm oven (275 F ) for about 4-6 minutes or until warm, they will crisp up again.
 DSC_0050

Read Full Post »

DSC_1558

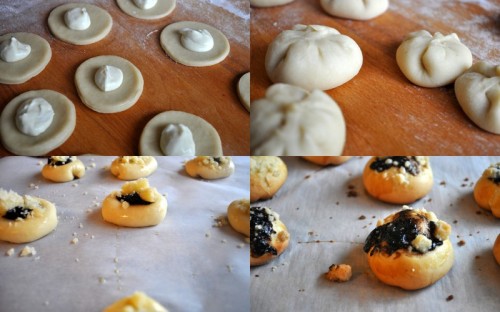
Since I skipped the last two Daring Bakers Challenge’s I was determined to get back in the swing this month. The September challenge was hosted by Lucie of Chez Lucie and she chose a traditional Czech pastry called Kolache. We were given thee different versions to try: Pražský koláč (Prague Kolach), Chodské koláče (Kolache from Chodsko), and   Dvojctihodné/Moravské koláče (Two Fillings/Moravian Kolaches) .   According to Wikipedia, Montgomery, Minnesota is the kolacky capital of the world. Who knew?? Maybe because they are so tasty….

DSC_1561

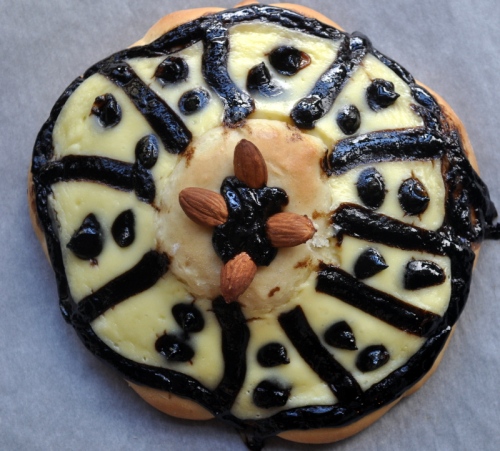
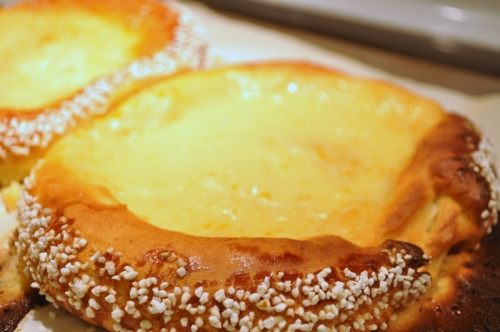
I made the Prague Kolache two weeks ago for a dinner we had with friends. I really was incredibly simple to put together and was light and delicious. When people ask for seconds I know it’s a winner. I could have eaten the whole thing myself. It’s essentially a large, round bread filled with a lightened pastry crème. For mine I chose to make a homemade butterscotch pudding for a little added flavor but the original calls for a simple custard. Do what floats your boat (or what you have on hand).

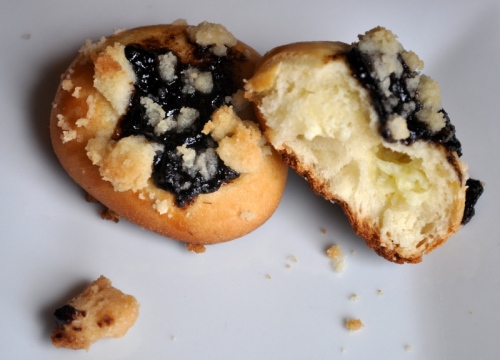
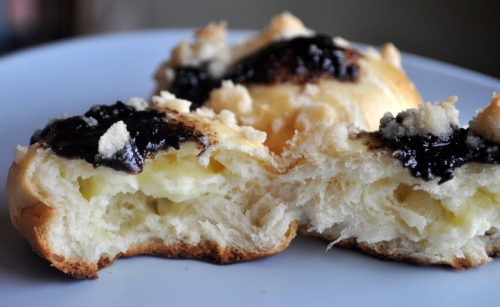
The Moravian Kolaches are little pillows of dough filled with a lightly sweetened quark and topped with a fruit jam.   Since I didn’t have any quark I used sour cream that I strained for 24 hours to thicken it. Again, make it work for you. I cheated on the third version by using some of the leftover dough and filling from the morovian version (see the  photo above). Please stop by Lucies blog to see her great step by step photos of all three versions.


While I really liked every version, the Prague version was hands down the winner, both for flavor and ease of preparation. Please try them and get back to me which was your favorite. Bake on!

DSC_1522


Ingredients
for cake:
1¾ cups (420 ml) (9 oz) (250 gm) all-purpose (plain) flour
½ cup (120 ml) (125 gm) mayonnaise (store-bought or home-made), room temperature (yes, mayonnaise)

2 tablespoons (30 ml) (1 oz) (30 gm) granulated sugar
1 small egg, room temperature
15 gm (½ oz) fresh yeast or 1 packet (2 teaspoons) (7gm) dry active yeast
5 tablespoons (75 ml) milk, warm
½ teaspoon (3 gm) salt
for the pastry cream:
2 cups (500 ml) milk, divided
½ cup (120 ml) (3½ oz) (100 gm) granulated sugar plus 1 tablespoon (½ oz) (15 gm)vanilla sugar
½ cup (120 ml) (2-2/3 oz) (75 gm) vanilla pastry cream powder (such as Birds)
1 stick (½ cup) (4 oz) (125 gm) butter, room temperature
5 tablespoons (75 ml) heavy whipping cream, chilled
for streusel topping:
1/3 cup (1¾ oz) (50 gm) plain flour
¼ cup (60 ml) (1¾ oz) (50 gm) butter, chilled and diced
¼ cup (60 ml) (1¾ oz) (50 gm) caster (or granulated) sugar
½ teaspoon (2 gm) ground cinnamon
for finishing:
1 small egg, lightly beaten

Directions:
In a bowl of your stand mixer, sift flour and make a hole in the middle. Crumble the yeast into the hole, add 1 teaspoon sugar and about 3 teaspoons warm milk. Mix yeast, sugar and milk with fork and lightly sprinkle the surface with flour. Cover the bowl with towel and let rise for 10-15 minutes. Add rest ingredients (mayonnaise, sugar, milk, egg and salt) and knead with dough hook on low speed for 10 minutes, until you have smooth dough. If you are using instant yeast, it is okay to place everything into the bowl at once.

Turn the dough onto a lightly floured surface. Cover with towel or plastic wrap and let rise for about an hour to double in volume. Form the dough into a ball and place it onto the baking sheet lined with parchment paper. With your palms and fingers press the dough and shape it to disc about 20–25 cm (8-10 inch) in diameter and 2–3 cm (¾-1 inch)thick. Let rise for 30 minutes.

Meanwhile preheat your oven to moderate 320°F/160°C/gas mark 3 .

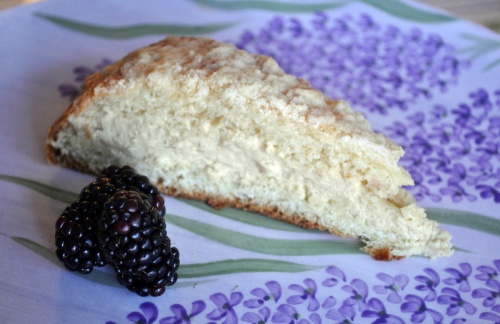
Make the streusel topping. In a medium bowl, mix together sugar, flour and cinnamon. Add cold butter and with your fingers, mix all ingredients until crumbly. Brush the cake with the beaten egg and sprinkle with generous amount of streusel topping. Bake for 20 minutes until golden brown. Let cool on a wire rack.DSC_1517


Prepare the pastry cream.
In a small bowl, mix well ½ cup (125ml) milk with the vanilla pastry cream powder. Set aside. In a saucepan, mix the rest of the milk 1½ cup (375ml) with the sugar and vanilla sugar and bring it to boil, stir occasionally. Add the milk-pasty cream powder mixture and boil for 3 – 5 minutes, stirring constantly.
Transfer the mixture into a bowl of your standing mixer fitted with paddle attachment and let cool completely, while stirring constantly on a low speed. Add diced butter and mix together.
Separately whip the double cream until stiff. Mix with vanilla cream.

Don’t be ashamed to use boxed vanilla pudding!

Cut cooled cake lengthwise and spread the cream onto the bottom part. Cover with upper part. Cut into 8 to 10 pieces


DSC_1554


MORAVIAN KOLACHES

Servings: about 30 small or 10 large kolaches 


Ingredients
for dough
3-2/3 cup (880 ml) (17-2/3 oz) (500 gm) all-purpose (plain) flour (use semi-coarse grounded if you can find in your store)
¾ cup (180 ml) (3½ oz) (100 gm) confectioner’s (icing) sugar
1 cup (250 ml) milk, warm
1/3 cup (80 ml) (2-2/3 oz) (75 gm) butter, melted
30 gm (1 oz) fresh yeast or 2 packets (4 teaspoons) (½ oz) (15 gm) active day yeast
pinch of salt
2 small egg yolks
for quark fillingDSC_1541
3 cups (1-2/3 lb) (750 gm) quark
1 small egg yolk
confectioner’s (icing) sugar to taste
for plum filling
2/3 cup (160 ml) (7 oz) (200 gm) plum jam
rum or hot water to soften jam if too thick
for streusel topping
1/3 cup (1¾ oz) (50 gm) plain flour
¼ cup (60 ml) (1¾ oz) (50 gm) butter, chilled and diced
¼ cup (60 ml) (1¾ oz) (50 gm) caster (or granulated) sugar

for finishing
1 egg, lightly beaten

Directions:
In a bowl mix together yeast and 1 teaspoon sugar. Add 4 tablespoons (¼ cup) warm milk, mix well and sprinkle with 1 tablespoon flour. Cover with plastic wrap and let rest for 10 – 15 minutes. (Skip this if you are using instant yeast. I used SAF Gold. Everything goes in the bowl together)
In a bowl of your electric mixer (or in a large bowl) mix flour, sugar, salt, egg yolks, butter, milk and leavened yeast. Knead with dough hook (or with wooden spoon) on low speed for about 10 minutes. Cover with plastic wrap and let rise for about one hour to double its volume.

Prepare quark filling – just mix all ingredientsDSC_1540

and

plum filling – mix plum jam with rum or water to soften it. Set aside.


Prepare streusel topping. In a medium bowl, mix together sugar, flour and cinnamon. Add cold butter diced in small cubes and with your fingers, mix all ingredients until crumbly. Alternately,  in a saucepan melt the butter, add flour and sugar at once and mix with fork until crumbly. Set aside.


When the dough is risen turn it onto a lightly floured surface and roll it with rolling pin to a thickness of about 2 cm (¾ inch). Cut with 10cm (4 inch) cookie cutter or just with a glass (if you want small kolaches) or divide the dough into 10 equal pieces (if you want large kolaches). Flatten each piece with your hands and fill with about 1 rounded teaspoon of  quark filling. Wrap it into a “purse” shape and pinch all the seams to seal.Preheat oven to moderate 340°F/170°C/gas mark 3. Line 2 – 3 baking sheets with parchment paper. Put each kolach onto a prepared baking sheet with seam down. Press each kolach in the middle to make an indent. Brush it with egg wash and fill holes with plum filling. Sprinkle it with streusel topping. Bake for about 20 minutes to golden brown.

Sept 14, 2014


Storage & Freezing Instructions/Tips:
All kolaches are best the first and second day but you can store them in an airtight container in a fridge up to 3 (Prague kolach) or 5 (Chodske and Double filling kolaches) days. You can also freeze Prague kolaches WITHOUT filling in a freezer for one month.

Additional Information:
Some additional recipes, in Czech:
http://dolcevita.blog.cz/0707/grandiozni-ceske-kolace
http://dulique.blogspot.cz/2010/01/sweettoothday-prazsky-kolac.html
http://www.svasniprojidlo.cz/2014/05/prazsky-kolac.html
http://www.ceskatelevize.cz/porady/10084897100-kluci-v-akci/206562221900…

Read Full Post »

DSC_3342
Can you believe it? I’m hosting this months Baker’s Challenge!! For my turn as hostess extraordinaire, I have chosen the gorgeous Neapolitan pastry, sfogliatelle. You might recognize them as the clam shaped pastry with hundreds of layers. They are filled with a  semolina-ricotta mixture that has added candied orange peel and a touch of cinnamon, served hot out of the oven (though I have eaten my fair share of room temperature ones).Here is a very interesting article on the history of this beloved pastry.

Growing up in Long Island, New York, it is virtually impossible to get away from Italian food.I think the natural progression for many Italian immigrants was to go from Italy, to Ellis Island, to Brooklyn, and then to Long Island.  For me though, my real love of Italian food, (and cooking in general) came later when I lived in Manhattan with my then boyfriend. We lived together for 10 years and the large family feasts at his parents Long Island home were memorable. We would arrive around noon and continue until late in the night with everyone pitching in with the cooking at one point or another. I really learned that the meal was as much about gathering together as it was about eating. Luckily for me, I am still extremely close with him and his family. He now even owns an Italian wine store in Brooklyn to go with the great food.  I now follow this tradition with my husband  by having our friends over as much as possible to enjoy their wit as well as food.
I wanted to choose something that would be a challenge; not only to you but for me as well. And I was right on point. I won’t lie to you, the first two times I made these it was a disaster. The third time was the charm and now they almost seem easy to make. The sfogliatelle ricci can be made over a period of days, if this makes it easier for you. I tend to like to make things in stages myself but you could also make this over the course of a long day. Keep in mind that you must chill the dough at various points before baking.
There are two main Italian versions of sfogliatelle. The first is sfogliatelle ricci (or Napoletane) and this is the crispy multilayered version. The second is sfogliatelle frolle, a tender almost cakey version covered in a soft pie crust like shell.
The American version goes by the name “lobster tail” and is a larger shell filled with a creme diplomat (pastry cream mixed with whipped cream) after it is baked. The dough is the same as Ricci but a dollop of pate a choux pastry is placed in the center of the shell before baking. This puffs up the core of the shell so that you can pipe in the creamy filling afterword. In one word, divine!

I am providing recipes for homemade ricotta cheese (so easy and so delicious), candied orange peel, sfogliatelle ricci and frolle dough. You must make the homemade cheese or the candied peel and at least one version of the sfogliatelle. Please experiment with filling flavors. I think chocolate ricotta with finely chopped pears would be lovely…The filling provided for the American Lobster Tail is a diplomat cream but I personally love marscapone mixed whipped cream. Again, amaze and inspire me. While I believe that the ricci version can only be made using a pasta roller, I hope that many out there prove me wrong!

Have Fun and Bake On!

Recipe Source:
The pastry dough recipe is from Great Italian Desserts by Nick Malgieri. Unfortunately this book is out of print but you can still find used copies online or if your lucky, your local library. The Ricotta Cheese recipe is from Luscious Creamy Desserts by Lori Longbotham. The method for making the lobster tails is from the Cake Boss You Tube video. The Pastry cream recipe is from Martha Stewart (but feel free to use any pastry cream recipe)

Dairy Free Ricotta Cheese: http://low-cholesterol.food.com/recipe/ricotta-cheese-substitute-vegan-gluten-free-447217

http://cassidyscraveablecreations.com/2012/09/ricotta-cheese-dairy-soy-nut-free.html

Equipment needed

Pasta machine to roll out the dough (this is for the Ricce and Lobster Tail)
Stand mixer with paddle and whisk attachments or hand-held mixer. You can make the dough in a bowl with a wooden spoon. If you choose to make the French Cream for the lobster tail you can whip the heavy cream by hand with a whisk
food processor (optional)
Whisk
rolling-pin
Grater for lemon and orange zest
Large pot to make the cheese
large glass or ceramic bowl
large strainer/colander
cheesecloth (I have used paper coffee liners as well)
medium saucepan for semolina
small bowl for butter/shortening mixture
Saucepan for pastry cream
Bowl for Pastry cream
Pastry Brush
Plastic wrap/cling film
parchment paper
baking sheets
cutting board
1/2 inch round pastry tip
Cooling rack

Fresh Ricotta Cheese (makes 2 cups)DSC_3361
8 Cups (1/2 gallon/64 oz/2 litre/4 pints) Whole Milk (or goats milk)
1 Cup (8 oz/250 ml) heavy whipping cream
1/2 tsp salt
3 Tablespoons fresh lemon juice

Line a large colander or strainer with 2 layers of cheesecloth that has been lightly dampened over a large glass; set aside.

Pour the whole milk, heavy cream and salt into a large pot and bring to a boil over medium heat, whisking occasionally. reduce the heat, add the fresh lemon juice and stir/whisk continuously for 2-3 minutes. The mixture will curdle, which is exactly what it is supposed to do. DSC_3363

Pour this into the cheesecloth lined strainer and let it drain for about 1 hour or until it comes to room temperature. At this point you can scrape the ricotta from the cheesecloth into a container and refrigerate for up to 2 days. The liquid in the bowl is the liquid whey, a very nutritional and tasty leftover byproduct from making cheese. It is excellent to use instead of water when baking bread, or adding it to soup stock. I love the stuff and never discard it. Here is an excellent article on the wonders of whey!

DSC_3395

Semolina-Ricotta Filling
This type is used for both the Ricci and the Frolle versions

5 minutes to make plus about 2 hours to chill

1 Cup (8 oz/250 ml) milk
1/2 cup granulated sugar
2/3 Cup fine semolina or cream of wheat (I have tried both and personally like the semolina version)
1 1/2 Cups whole milk ricotta, preferably fresh (see above)
2 large egg yolks
2 teaspoons pure vanilla extract (or the seeds of one pod and 1 tsp extract)
1/4 teaspoon ground cinnamon
1/3 cup candied orange peel (commercial or home-made)
zest of 1 lemon

Combine the milk and the sugar in a medium saucepan. Bring to a boil, lower the heat and slowly add the semolina (or cream of wheat), whisking quickly as to avoid any lumps. Cook, stirring often, until the mixture is smooth and thick, about 2 minutes. Spread the mixture onto a lined baking sheet, about 1/2 inch, to cool. When cool, break into pieces and place into the bowl of your stand mixer, fitted with the paddle attachment (or a food processor), and add the ricotta cheese, egg yolks, vanilla and cinnamon. Beat until very smooth and creamy. Stir in the candied orange peel and lemon zest. (Maybe even some mini chocolate chips? Or pistachios??mmmm…I can’t wait to see what you come up with)
Scrape into a container, place plastic wrap directly onto the surface and refrigerate until needed (up to 2 days)

DSC_3345

Sfogliatelle Ricci
You will need a large/long workspace for this. I used my dining room table for this though I am sure someone will be more creative with limited space!
4 minutes to make the dough
10 minutes to condition the dough in the pasta roller
2 hours chilling
35 minutes to roll the dough
2 hours additional chilling

Dough
3 Cups (12 3/4 oz/ 334 g) all-purpose flour
1 teaspoon salt
3/4 cup (6.2 oz/ 175 g) warm water (about 100F)

4 oz lard (I used Crisco butter flavored shortening)
4 oz (1 stick/1/2 cup) unsalted butter, softened

Combine the flour and salt in a large mixing bowl and stir in the water, or use your standing mixer with the paddle attachment for this.. The dough will be very dry. If you feel absolutely compelled, add an extra teaspoon of water but it is supposed to be very dry. Turn this out onto a clean work surface and knead the dough together, bringing in all the dry bits. At this point get your pasta roller out and ready. Roll out the dough to about 1/3 inch and pass through your pasta machine at the widest setting. I find it much easier to cut my dough in half and work 1/2 at a time for this step. Fold the dough in half after each pass also change the direction of the dough occasionally. After about 15 passes the dough should be very smooth. Knead the dough back into a ball and wrap in plastic wrap. Refrigerate and rest the dough for at 2 hours ,or overnight.

New York summer 20133

Beat the lard/shortening and butter together in your mixing bowl until very fluffy. Make sure it is thoroughly combined. Place into a bowl and set on the workspace in easy reaching distance.

New York summer 20131

Remove the dough from the refrigerator and divide it into 4 equal pieces. Working with one piece of dough at a time (cover the other pieces with a towel or plastic wrap), lightly flour a piece pass it through the pasta roller set at the widest setting. Try to get the dough as even as possible, your goal is an even rectangle strip, about 4 inches in width. If needed, fold it over on itself a few times until you get an even strip. Once even, Pass the dough through every setting, ending with the highest (mine is 7)
You should end up with a long 4 inch wide strip. Repeat with the other 3 remaining pieces of dough.DSC_3278

*For my own ease of use I made my own rolling pin contraption like you can see on many instructional videos. I turned 2 bowls upside down and placed them on my table where I was planning to work. I then took a rolling pin (w/handles, not french) and taped the handles to the bowls. Every time that a piece of dough is finished and ready I lightly floured the dough and rolled it up onto the rolling pin. When all 4 pieces of dough dough were finished it made it much easier to pull out a section at a time to stretch the dough. If you are clumsy like me you might like to try this too!

Place one piece of a strip on you clean work surface and paint (or smear) it liberally with the lard/butter mixture. I did about a 8 inch section at a time. Gently pull the sides of the dough and stretch it, starting from the middle and going out, until it is about 8 or 9 inches in width. Begin from the short end and start rolling the dough into a very tight roll. When you start to reach the end of your stretched section, stop and liberally grease up another section, stretching and rolling until all the dough is finished. When one strip of dough is finished, overlap the end of one to the beginning of the other; continue to pull, stretch and roll up.

New York summer 20132

Spread the lard/butter mixture over the entire finished log and starting in the middle gently run the hands down the length to extend the length another inch or so. This will release any air pockets and tighten the roll. Your finished roll should be approximately 10 or 11 inches.DSC_3288
Wrap in plastic wrap and chill for at least 2 hours or overnight. The dough may freezefrozen, for up to 3 months, at this time. Defrost it in the refrigerators overnight before using.

Preheat your oven to 400 F
Line 2 baking sheets with parchment.

Remove the dough from the refrigerator, unwrap, and place on a cutting board. Slice off about an inch from each end so that they are straight and even. Cut the roll into 1/2 inch slices.
Put the semolina-ricotta mixture into a pastry bag with a 3/4 inch opening (A disposable pastry bag or even a ziploc bag with the corner cut off is fine).

DSC_3313

Take one slice of dough and place it on your workplace. With the heel of your hand, push out from the center in one direction. Rotate the dough and do this in all four directions. This forms the dough and opens up the layers. New York summer 20135

Pick up the piece and insert your thumbs on the inside with your forefingers on the outside, and gently stretch the center to make it more into the shape of a cone. You don’t want the layers to actually separate.DSC_3321 Holding the cone in one hand, squeeze some of the filling into the cavity so it is full. Lightly push the opening closed. You do not have to seal the opening as the filling is too thick to ooze out during baking.

Place onto the prepared baking sheet and very lightly brush the outside of each completed pastry with the lard/butter mixture. Bake them for about 20 to 25 minutes or until they are a deep golden brown.
Remove from the oven and cool on a rack. These are best served warm with a sprinkling of confectioners sugar on the day they are made. To reheat them, just place them in a 350F oven for about 5-10 minutes.

DSC_3325

DSC_3354

Sfogliatelle Frolle (Makes 12 pastries)
This is a tender pastries, made with dough similar to pie crust |(and much easier to make). Some of my friends preferred these to the crispy sfogliatelle.

DoughDSC_3449
2 1/3 Cups all purpose flour
1/3 Cup granulated sugar
1/8 teaspoon salt
8 Tablespoons (4 oz) unsalted butter, cold
2 large eggs, beaten

Filling
See sfogliatelle ricci (I used dried apricots in this version)

Egg Wash
1 Large egg yolk
1 large egg
pinch salt

By hand: combine the flour, sugar and salt in a mixing bowl. Remove the butter from the fridge and pound in a few times with a rolling pin to make it pliable. Add it the flour and start rubbing it into the flour mixture with your fingertips, working from the bottom of the bowl upwards. Work quickly so the butter doesn’t get warm from your hands. This only takes a minute or two to complete. Add the eggs and stir into the dough with a fork until it starts to hold together. Empty it out onto your workspace and knead a few times. Shape into a disc, wrap in plastic and chill until firm. The dough can be made up to 3 days in advance.

New York summer 20134

Prepare the filling and chill it. Whisk to egg yolk, egg and salt together for the egg wash.

Divide the dough into 10 equal pieces. Roll each piece into 5 inch rectangle . Place a hefty tablespoon amount of filling on the lower half of the dough and pull the top half over this. Use your hands to press down around the filling and seal the edges together (like making ravioli). Use a 3 inch round cookie cutter (or glass) and cut away any excess dough.

Recently Updated
Place the formed frolle on a prepared baking sheet and chill for 2 hours
Preheat your oven to 375F
Brush the frolle with the egg wash and bake approximately 20 minutes, just until the frolle is baked through. Cool briefly on a rack.

and finally….

DSC_3385

American Lobster Tails

You need to prepare (and roll) a batch of the Sfogliatelle Ricci dough. Refridgerate until firm.

Pastry Cream

DSC_33815 minutes to make and 2 hours to chill

2 Cups (16 oz) whole milk
1/2 cup granulate sugar
1/2 vanilla bean, split lengthwise, seeds scraped
1/8 tsp salt
4 egg yolks
1/4 cup corn starch
2 Tablespoons butter
In a medium saucepan, combine milk, 1/4 cup sugar, vanilla bean and seeds, and salt. Cook over medium heat until mixture comes to a simmer. Meanwhile, in a medium bowl, whisk together egg yolks, cornstarch, and remaining 1/4 cup sugar. Whisking constantly, slowly pour about 1/2 cup of the hot-milk mixture into the egg-yolk mixture, 1/2 cup at a time, until it has been incorporated. Pour mixture back into saucepan, and cook over medium-high heat, whisking constantly, until it thickens and coats the back of a spoon, about 2 minutes. Remove and discard vanilla bean. Remove from the heat and add the butter, whisking constantly until the butter melts completely and is thoroughly blended into the mixture. Transfer to a bowl, cover with plastic wrap, pressing it directly onto the surface of the pastry cream to prevent a skin from forming. Refrigerate until chilled, at least 2 hours or up to 2 days.

Preheat your oven to 400 F. Line a baking sheet with parchment paper
Prepare the pate a choux:

Pate a Choux (this a HALF batch )
3/8 cup (87ml) water (this is half of a 3/4 cup)
3 Tbsp. (42g) unsalted butter
1/8 Tsp. Salt
2 teaspoons Sugar
1/2 cup (63g.) all-purpose flour
2 large eggs

Preparing batter:
Combine water, butter, salt and sugar in a saucepan over medium heat. Bring to a boil and stir occasionally. When it comes to a boil, remove from heat and add the flour, stirring to combine completely.
Return to heat and cook, stirring constantly until the batter dries slightly and begins to pull away from the sides of the pan (this will happen very quickly).
Transfer to a bowl and stir with a wooden spoon 1 minute to cool slightly.
Add 1 egg. The batter will appear loose and shiny.As you stir, the batter will become dry-looking like lightly buttered mashed potatoes.
It is at this point that you will add in the next egg. Repeat until you have incorporated all the egg. Now, I happen to use my KitchenAide standing mixer for this, but it’s just as easy to do this by hand (I’m just lazy).

Spoon into a disposable pastry bag. You do not a tip for this, you can just cut a 1/2 opening across the bottom when you are ready to fill your lobster tail pastry.

Watch this little video….

Take your prepared sfogliatelle Ricci dough out of the fridge and cut it into 1 inch thick slices. Press down on all four sides just like you were making sfogliatelle ricci (you are, just making a bigger version). Pipe in the pate a choux paste until it is about three quarters fulls. Gently close the opening (there is no need to seal it shut) and place it on your prepared baking sheet. Repeat until all of your Ricci dough is finished (You should get about 11 or 12 pastries). Lighlty brush the outside of the lobster tail with the lard/butter mixture and bake for about 20-25 minutes or until a deep golden brown. Cool on a wire rack.

DSC_3380

To make the diplomat cream you will need:
1 batch pastry cream
1 cup heavy cream, whipped

I like a 2:1 ratio of pastry cream to whipped cream but you might like a 1:1 ratio. I would whip 1 cup of heavy cream and start by only adding half of it to the pastry cream. Do you like the texture? Maybe you want it a little lighter… Either way, when you decide what you like.DSC_3384
Fold the whipped cream into the cold pastry cream. Transfer it into a pastry bag fitted with a 1/2 inch round tip and insert it into the wide end of a lobster tail. Squeeze in as much filling as you can get into it (the more the better!). These should be eaten the day they are filled (this won’t be a problem, trust me). Hope you enjoy!!

DSC_3393

Read Full Post »

DSC_2415

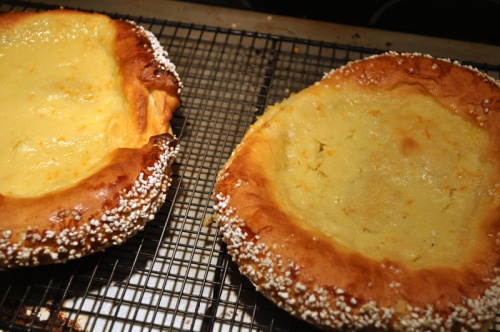
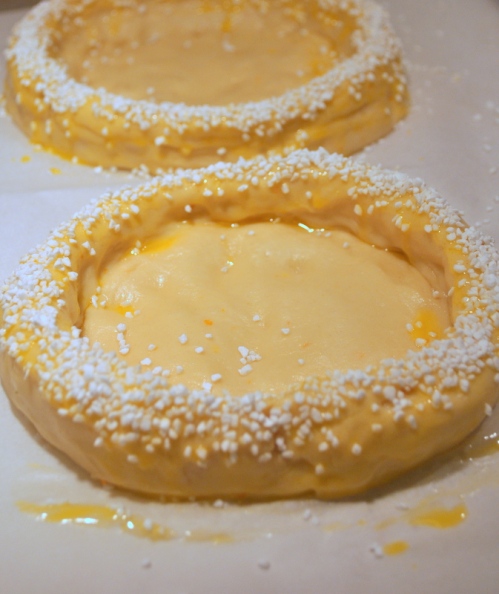
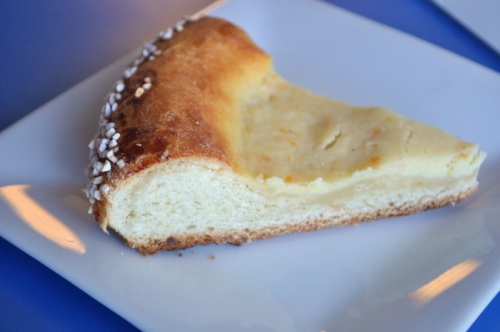
So I’m looking through a baking book the other day trying to find inspiration that will satisfy my need to bake something. I came across Lemon Brioche Doughnuts and thought “Perfect!”, but then suddenly remembered that I hadn’t checked yet  to see what was up for March from  the  Bread Baking Babes. Well. after finding out that  Lien was the host I was more than thrilled to see that she chose “Gateau a la creme” which is yummy brioche with a lemon custard filling. Talk about perfect timing. I was looking forward to making brioche since there hadn’t been any made since Christmas time. Buttery brioche baked in small pannetone papers are perfect gifts for people since they freeze beautifully and you can pull out one at a time without being tempted to eat an entire loaf of bread by yourself. Now it is March and it seems like a perfect time for brioche and this gateau is luscious and would be perfect for a Spring brunch (now all we need here in Calgary is Spring (as I look out at the snow on my lawn)).BBBuddies march 2013

After reading Lien’s recipe I was a little concerned about the small amount of eggs and butter (for brioche that is) but then when I started looking through my baking books I realized that there seems to be many variations on the quantity of these items.  One book uses 4 1/4 Cups of flour to 3 eggs, while another uses 4 1/2 Cups of flour and 6 eggs. Some recipes call for all  ingredients to be very cold, others for room temperature. Normally, I follow Peter Reinhardt’s recipe but now I think that in my near future a brioche bake-off is called for. The recipe Lien used has a relatively short kneading time, while it was my thought pattern that brioche (as well as panettone and stollen) needed a long kneading to fully develop the gluten structure so you get the “windowpane” effect. What was also interesting was that this version only called for the dough to chill in the fridge for about an hour and then you are ready to work with it, usually it chills overnight. Ahhh, the very perplexing world of enriched doughs….DSC_2421

In the end, I used Ciril Hitz’ version, and only because I wanted to put some dough into the freezer for later in the week (those doughnuts, remember?). His version actually has fewer eggs than the Raymond Blanc recipe – again, the mystery of it all – but it is so lovely to work with and to eat. A few people commented that Raymond’s recipe was a little dry so I went with this version to be on the safe side. It has a long chilling period, 6 hours in the freezer then 12 in the refrigerator, but it is really easy to make and patience is the only thing needed. Oh, and a standing mixer with a dough hook. At least for me. I was more than impressed to read that some of the BBB’s were kneading this by hand (I would never want to be cornered by one of them in a dark alley – arms of steel!), but in my opinion this is one of those doughs that a standing mixer is crucial. My Kitchenaid is over 20 years old and still works like a dream!

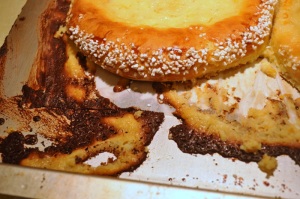
The filling is super simple to put together. It calls for 6 egg yolks (this is a good time to think about making macarons since you will have all those whites leftover), lemon juice, a little sugar and creme fraiche. Easy except I didn’t have any creme fraiche nor any heavy cream to make any, so I made mine with marscapone cheese. Yes, this is over the top indulgence, but boy did it work nicely. I only had 5 eggs left since I needed one for the egg wash so that would have to do (and it worked out fine). I found there was a little too much filling for the two small (about 7 inches around) brioche I made and I also filled one up too high which in turn made a burnt mess in my oven.

The seal of approval!

The seal of approval!

Would I recommend this? Yes. Was it easy? with a mixer, Yes.  Was is delicious? Totally, without being too sweet. (maybe I’ll have another piece right now just to make sure…) Bake On!

Please go to Liens post for the original recipe.

Gateau a la Creme

Brioche dough

yields four 7-inch gateau’s (or freeze half of the dough for up to 2 weeks for another use)

4 1/4 Cups (530g) All-purpose flourDSC_2401
1/4 Cup (50g) granulated sugar
4 tsp (14g) instant yeast (I used SAF Gold)
1 1/2 tsp (8g) salt
zest of 1 meyer lemon (use a regular lemon if you don’t have a meyer)
3/4 C (7 oz) whole milk
14 Tablespoons (200g) unsalted butter
1 whole egg
2 egg yolks

finishing:
Egg wash (1 yolk,as needed – I double washed so I used almost the whole thing)
swedish pearl sugar (decoration, as needed- optional)

Crème filling

5 egg yolks
1/4 Cup + 2 teaspoons (60g) granulated sugar
1 meyer lemon, juice and zest (I also threw in the juice leftover from the zested lemon needed for the dough)
200 G marscapone cheese

Make sure that the milk, eggs, and butter are cold.

Place all of the ingredients, except the butter,into the bowl of your standing mixer. Mix at low-speed until it all comes together, form a solid mass, and cleans the sides of the bowl (about 5 minutes). While this is mixing, pound your butter with a rolling-pin to make it pliable. You are not warming up the butter, just making it easier to blend. Break it up into 4 or 5 pieces.  Alternately, you can cut the cold butter up into tiny cubes.DSC_2403

Increase the speed on your mixer to medium and start adding the butter, slowly and in stages (4 0r 5). Make sure that all of the butter is fully mixed in before adding the next batch of butter. Continue to mix until all of the butter is fully incorporated into the dough and you get a good gluten structure. This will take 10 to 20 minutes. You want to be able to stretch the dough thin enough to see through (the “windowpane”) without tearing the dough. Form the dough into a ball, wrap with plastic wrap and place in the freezer for at least 6 hours, or up to 2 weeks. I cut my dough in half so I would have 2 pieces – I used one and the other is still in the freezer.

The day before baking remove the dough from the freezer and transfer to the refrigerator for 12 hours.

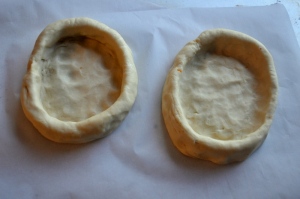
When ready to bake remove the dough from the fridge and let it sit out for 20-30 minutes at room temperature. Cut the dough in half..Take half of the brioche dough and bring it together with the palms of your hands to form a ball, then place it on a parchment lined baking tray and flatten it slightly. Starting from the middle of the dough, gently press the dough flat and spread it out to form a circle to approx 7 inches  in diameter, but leave about a 1 inch gap from the edge as this will create the rim of the tart. DSC_2404

Be careful not to stretch the dough and try to keep the base even in thickness. Use the second half of the dough for another gateau. I made the error on one of mine by making the rim too thin and then pouring in too much filling which of course made a mess in the oven….

DSC_2414

Cover these with greased plastic and a kitchen towel and let rest for 30 minutes.

Meanwhile, pre-heat your oven to 350F

For the crème filling, mix the egg yolks, sugar, lemon zest and juice together in a mixing bowl and gradually mix in the marscapone cheese. Set aside  until ready to fill.

DSC_2408

When you are ready to bake, brush the rims of your bread with the egg wash and sprinkle with the pearl sugar , if using. Pour some of the creme mixture into the middle about 1/3 way up. Pour the rest in (about 3/4 way up) when you have it in the oven so you don’t spill it all over when transferring it. Bake for 25 minutes or until golden and the filling is set. Cool completely, or serve slightly warm. Enjoy!

DSC_2428

The Bread Baking Babes

Read Full Post »

DSC_1738

pin it

Since December is already a crazy busy baking month, why not throw a delicious yeasted cake into the mix?! The December host of the Bread Baking Babes is Gretchen of Provecho Peru. She chose the lovely and easy German cake Apple Kutchen. It is perfect for this time of year and a breeze to put together. Being a good little baking buddy (well, I am trying to be at least) I firmly put my mind to baking this and not flaking off like last month. Since I didn’t have any apples on had I used some dried pears that I had. I first soaked them overnight in Amaretto and then rehydrated them in pear-cinnamon cider, finally giving them a rough dice. I also had some cranberries in the freezer (thank you Noelle for the idea) and last but not least, some finely diced crystallized ginger. It smelled heavenly coming out of the oven and now my mother has the perfect treat to bring with her to church on tomorrow morning. I was a little worried about how dark my crust was but when tried it I was happy that it was still very soft and moist. Easy and delicious. Bake on!

Holiday Apple  Pear Kutchen 
 

Yield: 12 servings

Source: Adapted from BH&G Holiday Baking 2009 Magazine

Ingredients

Crumb Topping

1/2 cup flour

1/4 cup quick oatmeal (I used Quaker)

3/4 cup brown sugar

5 tablespoons butter

1 teaspoon cinnamon

1/2 teaspoon cardamom

1/4 teaspoon allspice

Kuchen

2 1/4 – 2 3/4 cups flour,divided

1 package (2 1/4 tsp)active dry yeast (I used 2 teaspoon SAF gold yeast)
1/2 cup milk (I used lowfat)
1/2 cup granulated sugar
1/4 cup butter
1/4 teaspoon salt
2 eggs

Dried Pear topping

2 cups reconstituted dried pears, roughly diced

1/3 cup fresh or frozen cranberries (I tossed mine in a small bit of egg whites then some sugar so as to not be so tart)

2 Tablespoons crystallized ginger, finely diced

DSC_1726

*If you want to make it Apple Kutchen, use this for the fruit topping instead:

4 cups apple slices (about 4 medium baking apples)

1/3 cup brown sugar

1 tablespoon quick cooking tapioca

1 tablespoon lemon juice

1 teaspoon apple pie spice

CRUMB TOPPING:

In a medium bowl, combine flour and brown sugar. Using a pastry blender, cut in butter until the mixture resembles coarse crumbs. Set aside.

CAKE:

Grease a 13x9x2 baking pan; set aside.

In a large bowl, combine 1 cup of the flour and the yeast; set aside.

In a small saucepan, heat and stir milk, granulated sugar, butter and salt just until mixture is warm (120F-130F) and butter almost melts. Add milk mixture and eggs to flour mixture. Beat with an electric mixer on low to medium speed for 30 seconds, scraping sides of the bowl constantly. Beat on high-speed for 2 minutes or until smooth. Beat in as much of the remaining flour as you can without the mixer. Stir in any remaining flour to make a stiff batter.

Spread batter into the prepared baking pan. Evenly spread the pears over the top of the batter then sprinkle the cranberries over them and finally the ginger. Crumble the topping over the fruit mixture.

Cover and let rise in a warm place for 1 hour.

 (for apple topping combine apples, brown sugar, tapioca, lemon juice and apple pie spice. Place apple mixture on top of the batter. Sprinkle with Crumb Topping. )

Bake in a preheated 375F oven for 30 minutes or until top is browned and apples are tender. Cool on a wire rack for 30 minutes.

DSC_1733

BBBuddies Dec 12

Read Full Post »


How glad I am to write about puff pastry again. Since the last post about it (vols-au-vent) two years ago, I have made it puff pastry many times. That first time was nerve-wracking, with a few failed attempts along the way, but then after a few tries it all came together and then the lightbulb goes off and you realize that it isn’t difficult at all, just time consuming. While I will never judge anyone for using store-bought puff pastry, I use it myself in a pinch, there is a deep-rooted sense of satisfaction when you open the oven door and pull out a tray of perfect, flaky pastry that you made yourself.I’m not kidding.
The October Bakers Challenge was hosted by  Suz from Serenely Full and she chose a  French , though “wildly popular in Morocco”, dessert called mille-feuille, which translates into” cake with a thousand sheets”. It is a very elegant looking dessert that is absolutely delicious. All of your friends will love you for making this. Trust me on this.

This makes a pretty large quantity of puff pastry, but I find this recipe perfect for two reasons.
1.) It is actually easier to handle a large piece of dough
2.) Since this is such a labor of love (time consuming labour intensive), isn’t it easier to freeze half (up to 2 months) for the next time you need it?
This makes enough for three 11 x 17 pieces. I know this seems like a lot, and it is, but the few times I have made mille feuille in the past year it has been requested for a crowd, so this was perfect. You can easily cut the pastry down to fit the size pan that works for you. When doing this it is best to roll out the entire dough to about 1/8″ inch, cut off what you need, then roll the rest up in wax paper and freeze.

While I used to do the “diamond on the square” technique for making puff pastry, I have switched to a much simpler method.This is since discovering the amazing book “Bourke Street Bakery”. I have found their recipe/method to turn out perfect every time.

Part 1

PUFF PASTRY
4 3/4 oz ( 135 g) unsalted butter, diced and chilled
4 1/2 Cups (675 g/1 lb 8 oz) all purpose flour
1 Tablespoon (20 g) kosher salt
1 Tablespoon (20 ml) vinegar, chilled
10 1/2 oz (300 ml) water, chilled
1 lb (500 g) unsalted butter, for laminating, chilled

Take the 4 3/4 oz cubed butter out of the fridge about 20 minutes before starting, so it is soft but still cold
Step 1
In a large food processor, place the butter, flour, and salt together and pulse for about 30 seconds, or until it is crumbly and has a fine sand texture. Combine the cold vinegar and water and pour into the bowl, pulsing until the dough comes together into a ball. Take the dough out, pat it into a disk and wrap in plastic wrap. Placed in the fridge for 30 minutes (or overnight).
Step 2
Take the other one pound of butter and place it between 2 pieces of plastic wrap. Gently pound it with a rolling-pin into a 8 x 8 inch square. What I usually do is start between 2 pieces of wrap and then as I’m getting closer to the 8×8 I switch to a piece of parchment paper folded in half. You can use the folded inside edge to get a clean line on the one side of butter and then use a bench scraper push the other edges in place. Watch this video for good demonstration of this. Once you get your 8×8 square place it back in the fridge until your dough is ready to use.


Step 3
Take the dough out of the fridge and lay it on a lightly floured counter. Roll it out to 8 x 16 inches. Place the chilled 8×8 butter square at one end of the dough and fold over the other to cover it. Firmly pinch the edges together to completely seal in the butter. Turn the dough 90 degrees and begin to roll the dough out in long, even strokes. You want to end up with a 8 x 36 rectangle. Try to only roll in one direction to help promote lots of layers. I roll on one side then swivel the dough and continue rolling on the other end. Be patient, this takes a few minutes.
Once the dough is 8 x 36, fold the two short ends into the middle to meet, then fold it once again like you were closing a book. Dust very lightly with flour, wrap in plastic wrap and place in the fridge for 30 minutes. congratulations, you have just completed your first turn!


Step 4, 5,6
Repeat the folding process 3 more times, turning the dough 90 degrees each time. Every time you finish a completed fold you must place the dough back into the fridge for at least 30 minutes before rolling again. Myself, I complete 2 turns then place the dough in the fridge overnight and complete the next 2 turns the following day. You can do it all in one day, but you cannot skip the resting/chilling time between turns. This is crucial for relaxing the gluten and keeping the butter cold so you will end up with gorgeous, flaky, mile high pastry.
After the completed 4th folded turn, you now must wrap up your pastry and chill it overnight.
The next day….
Okay, now your pastry is ready to use! Yeah!!! Take the dough out and let it sit at room temperature for about 30 minutes before you begin rolling it out.
Part 2

PASTRY CREAM

2 Cups whole milk
3 large egg yolks
3 Tablespoons corn starch
1/3 Cup granulated sugar
1/8 teaspoon salt
1 teaspoon pure vanilla extract or the seeds of one vanilla bean

3 Tablespoons unsalted butter, diced

Whisk together the corn starch, egg yolks, and sugar; set aside

In a medium saucepan, heat the milk (and vanilla seeds, if using) until it is hot and steaming, but not boiling. Take the pan off the heat.Very slowly, and whisking constantly, pour some of the hot milk into the egg mixture (this is called tempering) then pour this back into the hot milk (keep whisking!). turn the heat to medium low and place the pot back onto the heat. Whisk the mixture until it thickens and begins to slightly bubble; simmer, whisking,  for one minute.

Pour the custard through a fine mesh sieve into a bowl. If using vanilla extract, stir in now. to prevent a “skin” forming on your custard, you can either place a piece of plastic wrap directly onto the surface or dust the entire surface with confectioners sugar. Let cool to room temperature then place in the fridge to cool completely.

Baking the pastry

preheat your oven to 400 F. You will need two 11 x 17 baking pans (or 2 baking pans the same size)

Line one baking pan with parchment paper. Roll out your dough to 1/8″inch into a 11 x 17 rectangle. Cut the pastry into 3 equal pieces (drag the knife through as opposed to straight down- this can ruin your lovely layers) and place side by side in the pan. Prick all over with a fork. Place in the fridge to chill for 30 minutes.

Place another sheet of parchment paper over the top and then the other baking pan on top. This will prevent the layers from puffing up too much. Bake for 15 minutes, remove the top tray and parchment, then return to the oven for another 10 minutes or until golden brown. Transfer to a cooling rack and let cool completely. You might need to gently pull the 3 pieces apart.

Assembly

Lay down one sheet of puff pastry. Cover with half of the pastry cream, spreading it as evenly as possible. Now take another piece of pastry and place it over this, pressing down gently. Spread the remaining pastry cream over this layer and finally top with the remaining piece of puff pastry.

Place this in the fridge while you prepare the topping (or you can just dust the top with a little sugar if you choose)

2 ¾ cups (660 ml/ 12⅓oz/350gm) icing sugar
2 teaspoons lemon juice
2 large egg whites
½ cup (2¾ oz/80gm) dark chocolate

To make the icing, whisk 2 egg whites with 2 teaspoons lemon juice until lightly frothy.Whisk in about (2 cups)  of the icing sugar on a low setting until smooth and combined. The mixture should be thick enough to leave trails on the surface. If it’s too thin, whisk in a bit more icing sugar.Once ready, immediately pour over the top of the mille-feuille and spread evenly. I found that I didn’t quite need all of the icing. Still working quickly, pipe a row of thin chocolate lines  along the widest length of your pastry sheet (see below). You can make them as far apart/close together as you like.Take a sharp knife and lightly draw it down (from top to bottom) through the rows of chocolate. A centimeter (½ inch) or so further across, draw the knife up the way this time, from bottom to top. Move along, draw it down again. Then up. And so on, moving along the rows of chocolate until the top is covered in a pretty swirly pattern.

The Switch-Up

As I have mentioned before, we have a monthly dinner supper which  I host every month (it’s easier and I enjoy it). The menu this month:

Pear and endive salad with blue cheese and pecans

Osso Bucco

Roasted butternut squash risotto

Pineapple infused napoleons with sauteed fresh pineapple

To make this dessert, I cut the pufpif pastry into small rectangles before baking and I did not place another baking sheet on top. I wanted these to rise to the heavens.  I had in my pantry some freeze dried pineapple, which I ground into a powder with the grinder. I then stirred this into some pastry cream. I then mixed up some whipped cream and slowly added this to the pastry cream to lighten up the whole mixture. OMG this was so good!! This was then piped (using a star tip) between the layers. I then diced up some fresh pineapple and sauteed it in a pan with brown sugar and rum. this was served on the side. Deluxe!!!!

Helpful links

http://moroccanfood.about.com/od/tipsandtechniques/ss/How-To-Make-Millefeuille-Napoleons_11.htm

Puff pastry video: http://www.youtube.com/watch?v=Zg-ybzGok3U Mille-feuille/Napoleon video: http://www.youtube.com/watch?v=oGQCWuKU7Co Vegan puff pastry: http://veganbaking.net/pastries/718-puff-pastry Gluten-free puff pastry (plus a chocolate mousse & raspberry mille-feuille): http://www.tarteletteblog.com/2010/04/recipe-gluten-free-puff-pastry.htm… Vegan pastry cream: http://vegandad.blogspot.co.uk/2011_08_01_archive.html

Read Full Post »

>

This month’s Bakers Challenge was hosted by Jason at Dailycandor.com. He introduced us to two very interesting and delicious Armenian desserts : Nazook (or nazuk, nazouk) and scented nutmeg cake. Both are winners.

Nazook is a rolled sweet pastry cookie which I thought was very similar to rugelach but the dough is made with yeast and sour cream. The dough is quite simple in fact, just flour, yeast, sour cream and butter. The fact that  there is no sugar is really nice and offsets the sweet filling. The traditional way is a vanilla filling but I also made a fig version and a cinnamon walnut version. I think this is one recipe that is hands down best the traditional way. While all three were incredibaly delicious (and not too sweet), the vanilla the stellar. If you have vanilla beans, this is the time to break them out. I used both vanilla bean seeds and pure vanilla extract for a double vanilla flavor. Pure heaven.

Nazook

Pastry dough

3 cups (720 ml) (420 gm/15 oz) all-purpose (plain) flour, sifted
2½ teaspoons (12½ ml) (7 gm) (¼ oz) (1 packet) active dry yeast
1 cup (240 ml) (225 gm/8 oz) sour cream
1 cup (2 sticks) (240 ml) (225 gm/8 oz) softened butter (room temperature)

Filling

1 1/2 cups (360 ml) (210 gm) (7½ oz) all-purpose (plain) flour, sifted
1 1/2 cups (360 ml) (340 gm/12 oz) sugar
3/4 cup (1½ sticks) (180 ml) (170 gm/6 oz) softened butter (room temperature)
seeds from 1 vanilla bean, scraped
2 teaspoons (10 ml) pure vanilla extract
Wash
1-2 egg yolks

Directions:

Make the Pastry Dough

Place the sifted flour into a large bowl. Add the dry yeast, and mix well. Add the sour cream and softened butter.
Use your hands, or a standing mixer with a paddle attachment, to work it into a dough. If using a standing mixer, switch to a dough hook. If making manually, continue to knead for about 10 minutes, or until the dough no longer sticks to the bowl or your hands. If it remains very sticky, add some flour, a little at a time.
Cover the dough and refrigerate for 3-5 hours, or overnight if you like.

Make the filling

 Mix the flour, sugar, and the butter in a medium bowl. Add the seeds from a scraped vanilla bean  (if using) and  vanilla extract. Mix the filling until it looks like clumpy, damp sand. It should not take long. Set aside.

Make the nazook

 Preheat the oven to moderate 350°F/175°C/gas mark 4.

 Cut the refrigerated dough into quarters. Form one of the quarters into a ball. Dust your working surface with a little flour. Roll out the dough into a large rectangle or oval. The dough should be thin, but not transparent.Spread 1/4 of the filling mixture across the rolled-out dough in an even layer. Try to spread the filling as close as possible to the edges on the short sides, but keep some of pastry dough uncovered (1 inch/2.5 cm) along the long edges. From one of the long sides, start slowly rolling the dough across. Be careful to make sure the filling stays evenly distributed. Roll all the way across until you have a long, thin loaf.Pat down the loaf with your palm and fingers so that it flattens out a bit (just a bit).

 Apply your egg yolk wash with a pastry brush.

Use a crinkle cutter (I used a serrated bread  knife) to cut the loaf into 10 equally sized pieces. Put onto an ungreased cookie sheet.Place in a preheated moderate oven for about 30 minutes, until the tops are a rich, golden brown. Cool and then try not to eat all of them!

 Next up…

Armenian Nutmeg Cake

1 cup (240 ml) milk
1 teaspoon baking soda
2 cups (480 ml) (280 gm/10 oz) all-purpose (plain) flour (I used pastry flour)
2 teaspoons baking powder
2 cups (480 ml) (400 gm/14 oz) brown sugar, firmly packed (I used demerara sugar)
3/4 cup (1½ sticks) (180 ml) (170 gm/6 oz) unsalted butter, cubed
1/2 cup (120 ml) (55 gm/2 oz) walnut pieces
1 1/2 teaspoons freshly ground nutmeg
1 egg

Preheat your oven to 350°F/175°C/gas mark 4.

Mix the baking soda (not baking powder; that’s for the next step) into the milk. Set it aside. Sift together the flour and the baking powder into a large bowl.Add the brown sugar and mix together.Cut the butter with a fork into the dry ingredients (you can use your food processor like I did). You’ll want to achieve a more-or-less uniform, tan-colored crumbly mixture.

Take HALF of this resulting crumbly mixture into your springform (9”/23cm) pan. Press a crust out of it using your fingers and knuckles. It will be easy.Crack an egg into a mixer or bowl and add the nutmeg .

Start mixing slowly with a whisk attachment and then increase to medium speed, or mix with a hand whisk if you’re doing it manually (or process for 60 seconds). Once it’s mixed well and frothy, pour in the milk and baking soda mixture. Continue to mix until uniform. Pour in the rest of the crumbly mixture. Mix well until thoroughly combined and fluid.Pour the batter over the base in the springform pan and sprinkle the walnut pieces over the batter.

Bake in a preheated moderate oven for about 30-40 minutes. You’ll know it’s done when the top is a golden brown, and an inserted toothpick comes out clean.

Allow to cool in the pan,release and enjoy!

freezing/Storage Instructions/Tips: Nazook will keep in an airtight container at room temperature for a couple of weeks, and the Armenian nutmeg cake will keep (covered) at room temperature for 2-3 days. Both taste even better still warm from the oven.

Allow to cool completely before attempting to freeze. Nazook will freeze best if put in a freezer bag with all the air squeezed out. Armenian Nutmeg Cake will also freeze fairly well if completely sealed. Both can be frozen for up to 3 months.
</a

Read Full Post »

Raspberry Ricotta Tart

Summer is pretty much in full swing right now, and the berries on our raspberry bush are in abundance this year. It seems that no matter how many you pick, there seems to be that much more the next day. I think I have frozen at least 8 -10 pints so far, besides all of the ones eaten fresh daily. Ahhh… the life. It helps that raspberries are one of the easiest things to grow. Basically, leave it alone. My kind of plant.

For the BBQ the other night I made a raspberry ripple ice cream and this, a raspberry ricotta tart. I’m calling it a tart but it could also be a crostata, I think.  This is real simple, rustic, beautiful summer eating. I wasn’t even planning on posting this until one of my guests stated that this was his favorite thing of the entire meal. If you have the ingredients on hand it only takes moments to put together. Again, perfect for summer. The base is puff pastry (who doesn’t love that?), so you can either make your own or use store-bought. While I actually like making my own (I am a glutton for punishment) and keeping it in the freezer, I had a sheet of store-bought sitting in the freezer and used that. Whatever you have will work. Bake on!

1 sheet puff pastry
1 small container ricotta cheese (I think mine was 225 g)
1/4 cup runny honey
1/4 granulated sugar
1 vanilla bean
2 tablespoons corn starch
2 egg yolks (save or freeze the whites for another use)
2 pints fresh raspberries, divided

Preheat your oven the 425 F

Roll out your sheet of puff pastry to approximately 12 x 15. Transfer to a baking sheet lined with parchment paper. Make a small lip by folding over the pastry about 1/3 of an inch all around. Lightly prick the center portion with the tines of a fork. Place the sheet into the freezer while you prepare the filling.

In a medium-sized bowl add the ricotta cheese, egg yolks, honey, sugar and corn starch. Scrape out the seeds from the vanilla bean and add to the bowl (Do not throw out the pod-save for another use). Stir everything together for about 1 minute, making sure it is fully smooth and blended.

Take the pastry out of the freezer and gently pour the cheese mixture into the middle of the tart. Using a spatula, spread the mixture evenly out, to about 1/8 inch of the border. If some goes onto the border, don’t worry, this will add to its rustic charm. Evenly sprinkle one pint of the raspberries over the top. Brush the border with a little cream or an egg wash (this helps to give it that golden brown color).
Bake in the oven for 25 minutes or until golden brown. As soon as it comes out,immediately sprinkle the other pint of raspberries over the top and drizzle a little more honey (if you wish) over the top. Let cool completely. Enjoy!

P.S.- since writing this 45 minutes ago, I have picked another 1 pound 4 ounces!!!!!

Read Full Post »
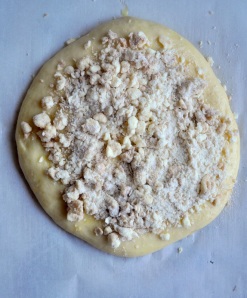
Well, it’s that time of the month again…and by that I mean the Bakers Challenge!
The May 2010 Daring Bakers’ challenge was hosted by Cat of Little Miss Cupcake. Cat challenged everyone to make a piece montée, or croquembouche, based on recipes from Peter Kump’s Baking School in Manhattan and Nick Malgieri. This is a very traditional French wedding cake and is really just lots of cream puffs “glued” together with a hard caramel sauce. You might think to yourself, “when am I going to need a traditional French wedding cake?”, but think again. Break is down and you have delicious cream puffs to serve as a dessert. If you can master the pate a choux (which is so incredibly easy), you will always be able to whip something up in a flash. You can fill them with ice cream, pastry cream, pudding, or whipped cream. You can make it as simple or complicated as you want. I loved the idea of making this colossal tower of cream puffs, but since this week it’s just me and my 4 yr old at home I opted to make a teeny tiny one. The balance of my cream puffs are in the freezer awaiting company.  I also made a version last week with chocolate pate a choux with a nutella cream center and chocolate sauce. Way too good!!!
Since we had to make a pastry cream for the filling, I chose to make a pistachio pastry cream then added some whipped cream mixed with pistachio brittle to lighten it up a little (funny how more cream can “lighten” something…) While I loved making this dessert in the future I will skip the caramel sauce my  – dentist will thank me.

Well, it’s that time of the month again… by that I mean the Baker’s Challenge.
The May 2010 Daring Bakers’ challenge was hosted by Cat of

For the Vanilla (or Pistachio) Crème Patissiere (Half Batch)
1 cup (225 ml.) whole milk
2 Tbsp. cornstarch
6 Tbsp. (100 g.) sugar
1 large egg
2 large egg yolks
2 Tbsp. (30 g.) unsalted butter
1 Tsp. Vanilla
1/2 C Pistachio paste (optional)

Dissolve cornstarch in ¼ cup of milk. Combine the remaining milk with the sugar in a saucepan; bring to boil; remove from heat.

Beat the whole egg, then the yolks into the cornstarch mixture. Pour 1/3 of boiling milk into the egg mixture, whisking constantly so that the eggs do not begin to cook.

Return the remaining milk to boil. Pour in the hot egg mixture in a stream, continuing whisking.

Continue whisking (this is important – you do not want the eggs to solidify/cook) until the cream thickens and comes to a boil. Remove from heat and beat in the butter and vanilla (and pistachio paste, if using).

Pour cream into a stainless steel/ceramic bowl. Press plastic wrap firmly against the surface. Place in the fridge to cool and until ready to use. You can make this up to 3 days in advance.
Pistachio Praline

1/2 C Sugar
2 Tbsp water
1/2 C shelled pistachios
1 C heavy cream, whipped

Line a sheet pan with either a piece of foil, lightly oiled, or a silpat.
Combine the sugar and water in a small heavy saucepan. Bring to a boil over medium heat and let it boil until it turns a nice golden color (about 5 minute). Quickly stir in the pistachios and spread onto prepared pan. Let cool completely then break into pieces. Process in food processor until finely ground. Combine with 1 cup whipped cream and the reserved pistachio pastry cream.
Pate a Choux (Yield: About 28)
¾ cup (175 ml.) water
6 Tbsp. (85 g.) unsalted butter
¼ Tsp. salt
1 Tbsp. sugar
1 cup (125 g.) all-purpose flour
4 large eggs

For Egg Wash: 1 egg and pinch of salt

Pre-heat oven to 425◦F/220◦C degrees. Line two baking sheets with parchment paper.

Preparing batter:
Combine water, butter, salt and sugar in a saucepan over medium heat. Bring to a boil and stir occasionally. When it comes to a boil, remove from heat and add the flour, stirring to combine completely.

Return to heat and cook, stirring constantly until the batter dries slightly and begins to pull away from the sides of the pan (this will happen very quickly).

Transfer to a bowl and stir with a wooden spoon 1 minute to cool slightly.

Add 1 egg. The batter will appear loose and shiny.As you stir, the batter will become dry-looking like lightly buttered mashed potatoes.

It is at this point that you will add in the next egg. Repeat until you have incorporated all the eggs. Now, I happen to use my KitchenAide standing mixer for this, but it’s just as easy to do this by hand (I’m just lazy)

Piping:
Transfer batter to a pastry bag fitted with a large open tip (I piped directly from the bag opening without a tip). Pipe choux about 1 inch-part in the baking sheets. Choux should be about 1 inch high about 1 inch wide.

Using a clean finger dipped in hot water, gently press down on any tips that have formed on the top of choux when piping. You want them to retain their ball shape, but be smoothly curved on top

Brush tops with egg wash (1 egg lightly beaten with pinch of salt).

Baking:
Bake the choux at 425◦F/220◦C degrees until well-puffed and turning lightly golden in color, about 10 minutes.

Lower the temperature to 350◦F/180◦C degrees and continue baking until well-colored and dry, about 20 minutes more. Remove to a rack and cool.

Can be stored in an airtight container overnight.

Filling:
When you are ready to assemble your piece montée, using a plain pastry tip, pierce the bottom of each choux. Fill the choux with pastry cream using either the same tip or a star tip, and place on a paper-lined sheet. Choux can be refrigerated briefly at this point while you make your glaze.

Use one of these to top your choux and assemble your piece montée.

Chocolate Glaze:
8 ounces/200 g. finely chopped chocolate (use the finest quality you can afford as the taste will be quite pronounced; I recommend semi-sweet)

Melt chocolate in microwave or double boiler. Stir at regular intervals to avoid burning. Use the best quality chocolate you can afford. Use immediately.

Hard Caramel Glaze:
1 cup (225 g.) sugar
½ teaspoon lemon juice

Combine sugar and lemon juice in a saucepan with a metal kitchen spoon stirring until the sugar resembles wet sand. Place on medium heat; heat without stirring until sugar starts to melt around the sides of the pan and the center begins to smoke. Begin to stir sugar. Continue heating, stirring occasionally until the sugar is a clear, amber color. Remove from heat immediately; place bottom of pan in ice water to stop the cooking. Use immediately.

Assembly of your Piece Montée:
You may want to lay out your unfilled, unglazed choux in a practice design to get a feel for how to assemble the final dessert. For example, if making a conical shape, trace a circle (no bigger than 8 inches) on a piece of parchment to use as a pattern. Then take some of the larger choux and assemble them in the circle for the bottom layer. Practice seeing which pieces fit together best.

Once you are ready to assemble your piece montée, dip the top of each choux in your glaze (careful it may be still hot!), and start assembling on your cake board/plate/sheet. Continue dipping and adding choux in levels using the glaze to hold them together as you build up.

When you have finished the design of your piece montée, you may drizzle with remaining glaze or use ribbons, sugar cookie cut-outs, almonds, flowers, etc. to decorate. Have fun and enjoy! Bon appétit!

Additional Information: Here are some videos you may want to take a look at before you get started on your piece montée.

1) Martha Stewart Assembles a Croquembouche:
http://www.marthastewart.com/recipe/marthas-famous-croquembouche

2) Assembling croquembouche using the interior of a cylinder:
http://www.youtube.com/watch?v=Fq-UgMxe0Y4
3) Asembling Free-standing Croquembouche with Chocolate Glaze:
http://www.youtube.com/watch?v=ZrIanD5pi9E&feature=related

4) Assembling a Croquembouche with Toothpicks and Cone:
http://www.youtube.com/watch?v=vIGaidsM-NI&feature=related

See this google images search of Croquembouche for inspiration:
http://images.google.com/images?hl=en&source=hp&q=croquembouche&btnG=Sea…

Here’s a link to a dairy-free pate a choux and crème patisserie recipe:
http://dairyfreecooking.about.com/od/dessertsbeverages/r/creampuffs.htm

Read Full Post »
Cannoli

vanilla bean filling with spiced pear and cranberry

Since I was too busy all month to make these while I was still in Calgary and made these the day before the deadline, they are the dessert that I brought for Thanksgiving. I have to be honest that I wasn’t that excited about making these since I grew up whole life (up until a few years ago that is) in New York and cannoli were common place and not usually the first thing I would grab for from the dessert plate. The filling can be great, but also not so great, so in that sense it is worth it to make your own. Since I don’t own cannoli forms and don’t really want to either, I decided to make it layered instead.I followed the recipe for the shells but still had a hard time getting the “blistered” effect, even after trying different temperatures with the cooking oil. They still tasted great though and I think I prefer the layered look over the traditional shell- it makes for a more elegant presentation. I made two different fillings, a pumpkin one (it is Thanksgiving after all) coating the shell with bittersweet chocolate and chopped pecan pieces, and a vanilla bean filling with spiced pear and cranberry compote. Even if you choose not to bother to make your own shells-in NY every Italian bakery sells them empty- you should at least make your own filling and then stuff them right before serving. These are really rich so one per person is more than enough. Good luck and have fun!

The November 2009 Daring Bakers Challenge was chosen and hosted by Lisa Michele of Parsley, Sage, Desserts and Line Drives. She chose the Italian Pastry, Cannolo (Cannoli is plural), using the cookbooks Lidia’s Italian-American Kitchen by Lidia Matticchio Bastianich and The Sopranos Family Cookbook by Allen Rucker; recipes by Michelle Scicolone, as ingredient/direction guides. She added her own modifications/changes, so the recipe is not 100% verbatim from either book.


CANNOLI SHELLS
2 cups (250 grams/16 ounces) all-purpose flour
2 tablespoons(28 grams/1 ounce) sugar
1 teaspoon (5 grams/0.06 ounces) unsweetened baking cocoa powder
1/2 teaspoon (1.15 grams/0.04 ounces) ground cinnamon
1/2 teaspoon (approx. 3 grams/0.11 ounces) salt
3 tablespoons (42 grams/1.5 ounces) vegetable or olive oil
1 teaspoon (5 grams/0.18 ounces) white wine vinegar
Approximately 1/2 cup (approx. 59 grams/approx. 4 fluid ounces/approx. 125 ml) sweet Marsala or any white or red wine you have on hand
1 large egg, separated (you will need the egg white but not the yolk)
Vegetable or any neutral oil for frying – about 2 quarts (8 cups/approx. 2 litres)
1/2 cup (approx. 62 grams/2 ounces) toasted, chopped pistachio nuts, mini chocolate chips/grated chocolate and/or candied or plain zests, fruits etc.. for garnish
Confectioners’ sugar

Note – If you want a chocolate cannoli dough, substitute a few tablespoons of the flour (about 25%) with a few tablespoons of dark, unsweetened cocoa powder (Dutch process) and a little more wine until you have a workable dough (Thanks to Audax).

BASIC CANNOLI FILLING
2 lbs (approx. 3.5 cups/approx. 1 kg/32 ounces) ricotta cheese, drained
1 2/3 cups cup (160 grams/6 ounces) confectioner’s sugar, (more or less, depending on how sweet you want it), sifted
1/2 teaspoon (1.15 grams/0.04 ounces) ground cinnamon
1 teaspoon (4 grams/0.15 ounces) pure vanilla extract or the beans from one vanilla bean
3 tablespoons (approx. 28 grams/approx. 1 ounce) finely chopped good quality chocolate of your choice
2 tablespoons (12 grams/0.42 ounces) of finely chopped, candied orange peel, or the grated zest of one small to medium orange
3 tablespoons (23 grams/0.81 ounce) toasted, finely chopped pistachios

PUMPKIN FILLING
1/2 cup (123 grams/4.34 ounces) ricotta cheese, drained
1/2 cup (113 grams/4.04 ounces) mascarpone cheese
1/2 cup (122.5 grams/4.32 ounces) canned pumpkin, drained like ricotta
3/4 cup (75 grams/2.65 ounces) confectioner’s sugar, sifted
1/2 to 1 teaspoon (approx. 1.7 grams/approx. 0.06 ounces) pumpkin pie spice (taste)
1/2 teaspoon (approx. 2 grams/approx. 0.08 ounces) pure vanilla extract
6-8 cannoli shells

1. In a bowl with electric mixer, beat ricotta and mascarpone until smooth and creamy. Beat in confectioner’s sugar, pumpkin, pumpkin pie spice, vanilla and blend until smooth. Transfer to another bowl, cover and chill until it firms up a bit. (The filling can be made up to 24 hours prior to filling the shells. Just cover and keep refrigerated


VANILLA BEAN FILLING
3/4 cup ricotta cheesed, drained
3/4 cup mascarpone cheese
1 vanilla bean, split down the center and the seeds scraped out. Put the seeds in the cheese mixture (add the bean to your sugar bowl for a fragrant sugar)
3/4 cup confectioners sugar, sifted

SPICED PEAR AND CRANBERRY COMPOTE
1/4 cup dark brown sugar
2 Tbsp unsalted butter
1/4 cup fresh cranberries
3 Tbsp dried cranberries
1 large pear, peeled and diced
1/2 tsp ground ginger
1/4 tsp nutmeg
1/8 tsp cloves
1 tsp cinnamon

Melt the sugar and butter in a saucepan over medium heat and then add the remaining ingredients. Cook for 10 minutes and then let cool completely. Can be made a day in advance

DIRECTIONS FOR SHELLS:
1. In the bowl of an electric stand mixer or food processor, combine the flour, sugar, cocoa, cinnamon, and salt. Stir in the oil, vinegar, and enough of the wine to make a soft dough. Turn the dough out onto a lightly floured surface and knead until smooth and well blended, about 2 minutes. Shape the dough into a ball. Cover with plastic wrap and let rest in the fridge from 2 hours to overnight.

2 Cut the dough into two pieces. Keep the remaining dough covered while you work. Lightly flour a large cutting or pastry board and roll the dough until super thin, about 1/16 to 1/8” thick (An area of about 13 inches by 18 inches should give you that). Cut out 3 to 5-inch circles (3-inch – small/medium; 4-inch – medium/large; 5-inch;- large. Your choice). Roll the cut out circle into an oval, rolling it larger and thinner if it’s shrunk a little.

3 Oil the outside of the cannoli tubes (You only have to do this once, as the oil from the deep fry will keep them well, uhh, oiled..lol). Roll a dough oval from the long side (If square, position like a diamond, and place tube/form on the corner closest to you, then roll) around each tube/form and dab a little egg white on the dough where the edges overlap. (Avoid getting egg white on the tube, or the pastry will stick to it.) Press well to seal. Set aside to let the egg white seal dry a little.

4. In a deep heavy saucepan, pour enough oil to reach a depth of 3 inches, or if using an electric deep-fryer, follow the manufacturer’s directions. Heat the oil to 375°F (190 °C) on a deep fry thermometer, or until a small piece of the dough or bread cube placed in the oil sizzles and browns in 1 minute. Have ready a tray or sheet pan lined with paper towels or paper bags.

5. Carefully lower a few of the cannoli tubes into the hot oil. Do not crowd the pan. Fry the shells until golden, about 2 minutes, turning them so that they brown evenly.

8. Lift a cannoli tube with a wire skimmer or large slotted spoon, out of the oil. Using tongs, grasp the cannoli tube at one end. Very carefully remove the cannoli tube with the open sides straight up and down so that the oil flows back into the pan. Place the tube on paper towels or bags to drain. Repeat with the remaining tubes. While they are still hot, grasp the tubes with a potholder and pull the cannoli shells off the tubes with a pair of tongs, or with your hand protected by an oven mitt or towel. Let the shells cool completely on the paper towels. Place shells on cooling rack until ready to fill.

9. Repeat making and frying the shells with the remaining dough. If you are reusing the cannoli tubes, let them cool before wrapping them in the dough.

Pasta Machine method:
1. Divide the dough into 4 equal pieces. Starting at the middle setting, run one of the pieces of dough through the rollers of a pasta machine. Lightly dust the dough with flour as needed to keep it from sticking. Pass the dough through the machine repeatedly, until you reach the highest or second highest setting. The dough should be about 4 inches wide and thin enough to see your hand through

2. Continue rolling out the remaining dough. If you do not have enough cannoli tubes for all of the dough, lay the pieces of dough on sheets of plastic wrap and keep them covered until you are ready to use them.

3, Roll, cut out and fry the cannoli shells as according to the directions above.

For stacked cannoli:
1. Heat 2-inches of oil in a saucepan or deep sauté pan, to 350-375°F (176 – 190 °C).

2. Cut out desired shapes with cutters or a sharp knife. Deep fry until golden brown and blistered on each side, about 1 – 2 minutes. Remove from oil with wire skimmer or large slotted spoon, then place on paper towels or bags until dry and grease free. If they balloon up in the hot oil, dock them lightly prior to frying. Place on cooling rack until ready to stack with filling.

roll it out as thin as possible

DIRECTIONS FOR FILLING:
1. Line a strainer with cheesecloth. Place the ricotta in the strainer over a bowl, and cover with plastic wrap and a towel. Weight it down with a heavy can, and let the ricotta drain in the refrigerator for several hours to overnight.

2. In a bowl with electric mixer, beat ricotta until smooth and creamy. Beat in confectioner’s sugar, cinnamon, vanilla and blend until smooth. Transfer to another bowl and stir in chocolate, zest and nuts. Chill until firm.(The filling can be made up to 24 hours prior to filling the shells. Just cover and keep refrigerated).

ASSEMBLE THE CANNOLI:
1. When ready to serve..fill a pastry bag fitted with a 1/2-inch plain or star tip, or a ziplock bag, with the ricotta cream. If using a ziplock bag, cut about 1/2 inch off one corner. Insert the tip in the cannoli shell and squeeze gently until the shell is half filled. Turn the shell and fill the other side. You can also use a teaspoon to do this, although it’s messier and will take longer.

2. Press or dip cannoli in chopped pistachios, grated chocolate/mini chocolate chips, candied fruit or zest into the cream at each end. Dust with confectioner’s sugar and/or drizzles of melted chocolate if desired.

pumpkin filling drizzled with caramel sauce

Read Full Post »
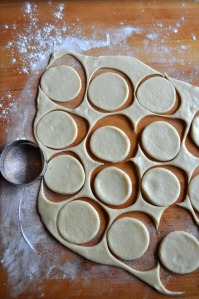
Older Posts »