Feeds:
Posts
Comments

Archive for the ‘biscuits’ Category

DSC_0118

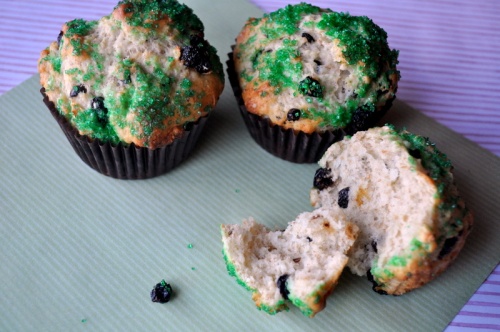
Irish soda bread muffins,  that is.

On St. Paddy’s day, I am always reminded of the  “holiday” cards my mom would get from the O’Wileys or the O’Gormans. Her friends always adding the “O'” to their last names to get in the spirit of things. I also remember my mom making corned beef and cabbage back when I was in grade school. I haven’t eaten beef since I was 12 yrs old but I was just telling my husband yesterday that I remember it tasting SO good. While he won’t be having that tonight I did just buy some Guinness beer and will make him a beef irish stew. As for me, I have already had a delicious irish soda bread muffin with my morning coffee.

These are super fast and easy to put together. Since they are baked in a muffin tin the baking time is only 20 minutes. The size is perfect. One went in my daughters lunch box, another wrapped up for her teacher.

Back in the day, for a few years I had an office that overlooked 5th Avenue in Manhattan and had the annual St. Patrick’s Day parade pass under my window. The streets would be filled with many drunk folks and after work I am sure I was one of them too. Never green beer though. Now I bake muffins. O’ the times they are a changin’….

Bake On!

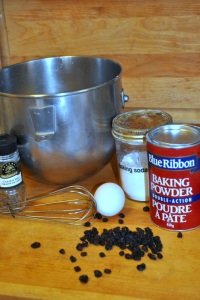
IRISH SODA BREAD MUFFINSDSC_0113
Yields 12 muffins

1 1/2 cups (177 g) AP Flour
3/4 cup (85 g) whole wheat flour
2 tsp baking powder
1/4 teaspoon baking soda
1/2 teaspoon salt
1/3 cup (74 g) granulated sugar (I actually used 1/4 c)
1  cup (135g) currants
1 teaspoon caraway seeds, or to taste
1 large egg
1 cup (8 oz)  buttermilk
1/3 cup (2 3/8 oz) canola oil

Preheat your oven to 400 F and line a muffin tin with papers.

Whisk together all of the dry ingredients.
In a separate bowl, whisk together the wet ingredients (egg, buttermilk and oil) wet

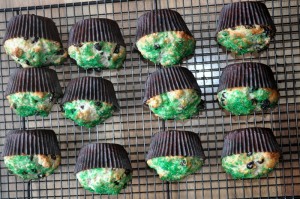
Pour the wet ingredients over the dry and give a few quick stirs with a large spoon to combine everything. Do not overmix! As with all muffin recipes, this only toughens the dough. It will be a thick batter. Fill each muffin tin 3/4 of the way full and sprinkle with some course sugar (I used green).DSC_0115
Bake for 20 minutes or until light golden brown. Flip them out of the pan so the bottoms don’t get soggy. Let cool slightly before digging in.


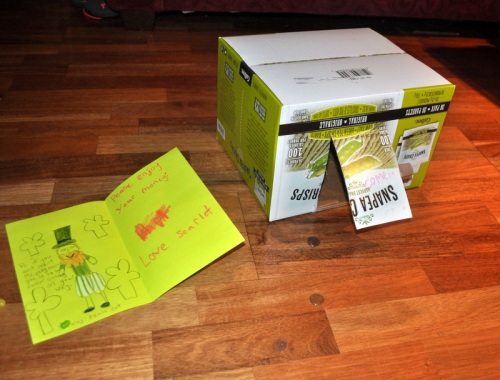
The leprechaun catcher…….
DSC_0121-002


Recipe adapted from King Arthur Flour

Read Full Post »

DSC_1091

I have to admit I loved this months Daring Bakers Challenge. Why? Because even after looking at the recipe several times this month I just got around to trying it out today and was thrilled to see how fast it came together. 5 minutes to mix it together, 20 minutes in the oven and then you are rewarded with little magic puffs, crispy on the outside and pillowy soft on the inside. Oh, did I forget to mention they are filled with cheesy goodness? I would say these are the Brazilian version of French gougères. But different. And gluten-free. Isn’t that a nice bonus? This is a recipe worth keeping for when you have company over with dietary needs that you normally don’t cook for. Like gluten-free cooking. the secret ingredient is sour cassava (tapioca) starch. Made from the yucca plant, the sour tapioca starch undergoes a natural fermentation process and the texture is more granular before baking than regular tapioca flour. Our host this month, the lovely Renata from“Testado, Provado & Aprovado!”, has this to say about the starch:

“TAPIOCA STARCH (also known as CASSAVA STARCH) is the main ingredient of Pão de Queijo. Here in Brazil there are two types: REGULAR and SOUR. The regular type is easier to find in other countries, but if you are lucky enough to find the sour type in your area, I highly recommend you try it (quantities will be provided when applicable). It looks pretty much like any other starch, powdery and white, sometimes it has little granules.
You can find tapioca starch at amazon.com:
Regular Tapioca starch (tapioca flour)
Sour Tapioca Starch (this is a Brazilian brand, quite overpriced. Here in Brazil it costs around US$ 2!)”

DSC_1312
Here in Calgary I had no problem finding the sour starch at my local South American market (yes, I have a  South American market down the street). I hope that it is just as easy for you (try looking in the spanish section). Otherwise, just use regular  tapioca flour.

The second most import ingredient is cheese. The authentic recipe calls for “Queijo Minas Curado” which is typical from Minas Gerais. They did not have this at the store so I relied on what I had in the fridge, smoked applewood cheddar. I don’t know what the other cheese tastes like, Reneta compares it to Monterey Jack, but the applewood cheddar was AMAZING.

DSC_1323

These are super simple to make, and are best are best eaten straight from the oven, or warm if you can wait that long. Keep a batch of rolled dough balls in the freezer to bake straight out of the freezer. Roll smaller balls so when company pops by they are the perfect accompaniment with cocktails, or larger balls for a dinner side dish or Panini roll.

I made the traditional version, but you must visit Renata’s site to get the two other versions. If I only had a waffle iron… I also cut the recipe down to 1/4  since there was just the three of us but next time (and there will be a next time) I will make the full batch and freeze the uncooked dough balls. Bake On!

TRADITIONAL PÃO DE QUEIJO
Servings:
Yields about 80 small balls

Ingredients:

500 gm (4 cups) tapioca starch (If you have access to sour tapioca, you can use 250gm (2 cups) of each)
1 cup (250 ml) whole milk
2-3/4 tablespoons (40 ml) (1½ oz) (40 gm) butter
1 teaspoon (5 ml) (3 gm) salt (or to taste depending on how salty your cheese is)
3 cups (750 ml) (9 oz) (250gm) Monterey Jack Cheese (or another cheese of your liking, or a mix of cheeses), coarsely grated
1 to 3 large eggs

Directions:

Heat milk, butter, and salt in a small sauce pan until it comes to a boil. Watch closely as it may boil over. Remove from heat and set aside.

Sift the  tapioca starch into a large bowl.

Pour the hot liquid  mixture over the tapioca and start stirring with a fork. The milk mixture will not be enough to form a dough yet. You will have a lumpy mixture, that’s what it is supposed to be.Keep stirring with the fork, breaking down the lumps as much as you can, until the mixture cools down to warm.

Preheat your oven to moderately hot 400° F/200° C/gs mark 6

DSC_1310

Add the grated cheese to the tapioca mixture and mix well, now using your hands.

Lightly beat the eggs with a fork and add little bits until the dough comes together into a soft but pliable dough. You only have to knead it a bit, not as much as you knead a yeasted bread. It’s OK if it is slightly sticky.Form balls with the dough and place them on a baking sheet lined with parchment paper or silicon mat or lightly greased with vegetable oil. If necessary, you can oil your hands to make shaping easier. The size of the balls may vary from small bite-sized balls to the size of ping-pong balls. They will puff up quite a bit after baking.25 minutes or until they just start to brown on the bottom. You may have golden spots of cheese on the crust. Don’t over-bake as they will get hard and bitter.

DSC_1311

NOTE: If your dough gets too soft and sticky to shape balls, you can always add a bit more tapioca starch or pop the dough into a piping bag and pipe the dough on a baking sheet.


Additional Information from Renata:

This recipe doesn’t require a stand mixer and, traditionally, it is made by hand. This recipe does not require a stand mixer and, traditionally, it is made by hand. However, it is indeed sort of a “heavy” dough. However, it is indeed a sort of “heavy” dough. Though I have never tried using a stand mixer here, I found someone who has. Though I have never tried using a stand mixer here, I found someone who has. Her name is Raiza Costa and she blogs at Dulce Delight. Her name is Raiza Costa and she blogs at Dulce Delight. She’s a Brazilian living in the US and she makes lovely videos in English. She’s a Brazilian living in the U.S. and she makes lovely videos em Inglês. I thought I’d share her “Pão de Queijo” post (with video) with you: I thought I’d share her “Cheese Bread” post (with video) with you:
Another link to a video showing the process by hand. Another link to a video showing the process by hand. It’s in Portuguese but the method is clearly shown: It’s in Portuguese but the method is Clearly shown:
Sour manioc starch (poviho azedo) and manioc starch (also known as sweet manioc starch or poviho doce) are both extracted from yucca. The difference is that sour manioc starch undergoes a natural fermentation process. As a result, manioc starch (the sweet one) has a much finer consistency and more delicate texture than sour manioc starch.
Read more at http://leitesculinaria.com/32757/recipes-brazilian-cheese-rolls.html#Xhw8sSPoMEYCkob6.99


DSC_1316


Read Full Post »

This months bakers challenge was hosted by  Audax from Audax Artifex. In many ways he is the backbone among us; always the first to complete the challenge and  always providing insightful tips on how to make the challenge more successful. There is never a challenge that he doesn’t seem to take to the limit, pushing flavor boundries to the edge. So it was somewhat of a surprise that when it was his turn to host he chose biscuits. In his native Australia, they are known as scones, but here in North America they are called baking powder biscuits, or biscuits.  What I love about this challenge is that while it appears so simple and basic, it is so elusive in reality. How many times have you been to someone’s house and were served hockey pucks that were disguised as biscuits- or worse- how many times have you served them to guests??

With all this being said, you must go visit his site and read up all about his  trial and errors. He has some wonderful and interesting things to say on the subject that are not to be missed.

For mine, I baked up the basic version and a cheddar cheese version. The latter I brushed with garlic butter and dried parsley as soon as they came out of the oven which made them taste just like the cheddar bay biscuits served at Red Lobster (mmmm). Many others in the Daring Bakers crew added raisins or fruit so you should check it out, but I like my biscuits without such things. I did try a gingerbread version but decided I like gingerbread cake, not gingerbread biscuits.

We go through spurts of baking biscuits, so they are no stranger to this house. I love this recipe, which is so good with breakfast, but Audix has provided a lovely version as well. There are a few things that will definitely take away with me from this challenge. 1) Grate frozen butter with a box grater (this virtually cuts out blending with your fingertips). 2) use half butter, half shortening 3) let the dough rest before and after cutting

Biscuits are one of those staples that everyone should know how to bake. So give it try and bake on!

Baking Powder Biscuits

1 cup (240 ml) (140 gm/5 oz) plain (all-purpose) flour
2 teaspoons (10 ml) (10 gm) (⅓ oz) fresh baking powder
¼ teaspoon (1¼ ml) (1½ gm) salt
2 tablespoons (30 gm/1 oz) frozen grated butter (or a combination of shortening and butter)
approx. ½ cup (120 ml) cold milk
optional 1 tablespoon milk, for glazing the tops (which I don’t do)

Cheddar Cheese variation: Add 2 ounces grated sharp cheddar cheese to the dry ingredients. When fresh out of the oven brush immediately with garlic butter and sprinkle lightly with dried parley.

 Preheat oven to very hot 475°F/240°C/gas mark 9
 Triple sift the dry ingredients into a large bowl. 
Rub the frozen grated butter (or combination of fats) into the dry ingredients until it resembles very coarse bread crumbs with some pea-sized pieces if you want flaky scones or until it resembles coarse beach sand if you want tender scones.
 Add nearly all of the liquid at once into the rubbed-in flour/fat mixture and mix until it just forms a sticky dough (add the remaining liquid if needed). The wetter the dough the lighter the scones (biscuits) will be! Cover the bowl with plastic wrap and place in the fridge for 10 minutes.
 Turn the dough out onto a lightly floured board, lightly flour the top of the dough. To achieve an even homogeneous crumb to your scones knead very gently about 4 or 5 times (do not press too firmly) the dough until it is smooth. To achieve a layered effect in your scones knead very gently once (do not press too firmly) then fold and turn the kneaded dough about 3 or 4 times until the dough has formed a smooth texture. (Use a floured plastic scraper to help you knead and/or fold and turn the dough if you wish.)


 Pat or roll out the dough into a 6 inch by 4 inch rectangle by about ¾ inch thick (15¼ cm by 10 cm by 2 cm thick). Using a well-floured 2-inch (5 cm) scone cutter (biscuit cutter), stamp out without twisting six 2-inch (5 cm) rounds, gently reform the scraps into another ¾ inch (2 cm) layer and cut two more scones (these two scones will not raise as well as the others since the extra handling will slightly toughen the dough). Or use a well-floured sharp knife to form squares or wedges as you desire. 
Place the rounds just touching on a baking dish if you wish to have soft-sided scones or place the rounds spaced widely apart on the baking dish if you wish to have crisp-sided scones. Pop them back in the fridge for another 10 minutes.

Glaze the tops with milk if you want a golden colour on your scones or lightly flour if you want a more traditional look to your scones. (I never do either of these things)
 Bake in the preheated very hot oven for about 10 minutes (check at 8 minutes since home ovens at these high temperatures are very unreliable) until the scones are well risen and are lightly coloured on the tops. The scones are ready when the sides are set.
 Immediately place onto cooling rack to stop the cooking process, serve while still warm. Enjoy!

Read Full Post »

Eggnog Pumpkin Angel Biscuits

Busy baking? Yes
Lazy blogger? Always
I swear, I’ve been baking. We had a small army of tomatoes from the community garden so I made a pate brisee dough, placed half in the freezer for a later use, and rolled the other half out and into a tart pan. No need to blind bake with this one. I brushed the bottom of the shell with a smoky red pepper spread, then a layer of ricotta cheese (mixed with a few egg yolks and some grated parmesan), and topped the whole thing off with layers of thickly sliced tomatoes. It was baked in a 375 oven for 40 minutes, till it was hot and bubbly. Soooo good for dinner with a tossed salad. Oh, and did I mention all of the Halloween cookies that I am getting ready? That will be a post for next week….

I still had some pumpkin puree left over from the Thanksgiving pumpkin pie that needed to get used. I kept thinking that I would make a pumpkin cranberry bread pudding, but I just was not in the mood for something sweet (what???). Angel biscuits are what I made instead. I am calling these Eggnog pumpkin angel biscuits since I just started making these and realized I didn’t have buttermilk for the liquid, but what I did have in the fridge was eggnog! It’s been a long time since I made these so I can’t give an actual taste comparison but I can tell you that they are outstanding when made with eggnog. There are many reasons to love these biscuits. You can whip up the dough the night before and wake up the next morning and bake them fresh out of the oven. I actually did it two ways. First I made the dough, placed it in the fridge for 1 hour, rolled it out, cut them and placed half in the oven for dinner. The other half (already rolled,cut,and  brushed with butter) in the fridge over night and baked them the next day. Equally delicious. these are also great because they are not sweet so they are great with some butter and jam,  as a cream cheese/jam sandwich (which is how my daughter likes them), or filled with smoked  Bavarian sausage (which is how my hubby liked them). I think they  would be great with sliced brie and pears…

Now, there are two ways to bring this together. You can mix it altogether in a food processor, or you can use a pastry blender. You know, it’s that half circle tined tool that you might not be sure of what to do with it. It’s perfect for cutting butter into flour. Unfortunately mine broke a while back , so I used the food processor, but I would never hesitate using that handy tool and you shouldn’t either. Bake On…

EGGNOG PUMPKIN ANGEL BISCUITS

Yields 17 large biscuits or 24 small biscuits

2 1/4 tsp active dry yeast
1/2 Cup  warm water (about 100 F)
5 Cups All purpose flour
1/4 Cup granulated sugar
1 Tablespoon pumpkin-pie spice
1 teaspoon baking powder
1 teaspoon baking soda
1 teaspoon salt
1/2 Cup (4 oz) unsalted butter, cold, cut into small cubes
1 Cup eggnog (or buttermilk)
1 Cup pumpkin puree
1 Tablespoon melted butter (for brushing the tops)

Dissolve the yeast in warm water in a small bowl; set aside .

Whisk together the flour, sugar, pumpkin-pie spice, baking powder, baking soda, and salt in a large bowl (or food processor). Cut the butter into the flour mixture  using your processor (or pastry blender) until your butter pieces are incorporated, but you want to see several small pea size pieces sprinkled throughout. That is what gives you a light and flaky biscuit. If you are using a processor, transfer the mixture to a large bowl.

In a separate bowl, mix together the pumpkin puree and the buttermilk until smooth. Add it to the flour mixture along with the yeast mixture. Stir everything together until just moistened. Like all biscuits, you want to use a light touch at this stage of the game.  Cover the bowl with plastic wrap and place in the fridge for 1 hour (or overnight).

Preheat your oven to 450F. Spray two 10 inch cake rounds with PAM (or use a large baking sheet).

Turn the dough out onto a lightly floured workspace and knead a few times. I said a few – don’t manhandle it. Roll it out to 1/2 inch thick and cut with a 3 1/4 inch round cutter (or 2 inch for smaller biscuits).Gather up the scraps and reroll it. Place the biscuits in the prepared pans. Brush the tops with a little melted butter and bake until golden, about 12 minutes. Serve warm with butter or cold with sandwich meats/cheese. Enjoy!

Read Full Post »

Bacon Biscuits

The latest recipe from “A World of Baking” is a simple biscuit but some of the best I have made in years (such a delightful book).  A great Sunday morning treat.  Remember to work them very, very lightly.

MY BISCUITS

2 C sifted all-purpose flour
1 Tbsp baking powder
1/2 tsp salt
1/3 C unsalted butter
2 large eggs
about 1/2 C milk
1/2 C crisp pieces of cooked bacon

Preheat the oven to 425 F

Sift flour, powder,and salt. Cut in the butter with a fork. Add the eggs and enough milk to made a dough that holds together and can be kneaded. Add the bacon. Turn the dough out onto a lightly floured counter and knead very, very lightly- no more than 10 times. Pat the dough out to a thickness of about 1/2 inch. Cut into rounds (1,2, or 3 inch – whatever strikes your fancy). Bake on an unbuttered baking sheet for 12-15 minutes.

Enjoy!

Read Full Post »