Feeds:
Posts
Comments

Archive for the ‘bread’ Category


DSC_0575

Where does the time go? All of a sudden, I look up at the  calendar and realize that it is the end of the month already. Arghh… What was the Bakers Challenge?? Lamingtons – sounds great. Make them in hurry, three varieties. Taste great. I now realize that it is past the 27th and it takes me hours to post something. I just don’t have the motivation to stay up until midnight blogging. I guess I am skipping another month….  Am I the only one who feels like a loser for doing this?

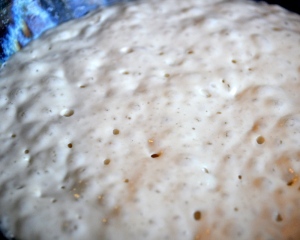
Okay, so what about the Bread Baking Babes? Maybe I will give this a shot and be on time. Cathy, from Bread Experience was the babe of the month. A quick look at the recipe and I see that a poolish is needed. It takes 14 + hours, but I really want to try this recipe. Oh well, I guess being on time is not my thing. I could have done it if I stayed up until midnight, but no, I chose to pop my final dough into the fridge overnight before shaping and baking this morning. More flavor, right? Right!

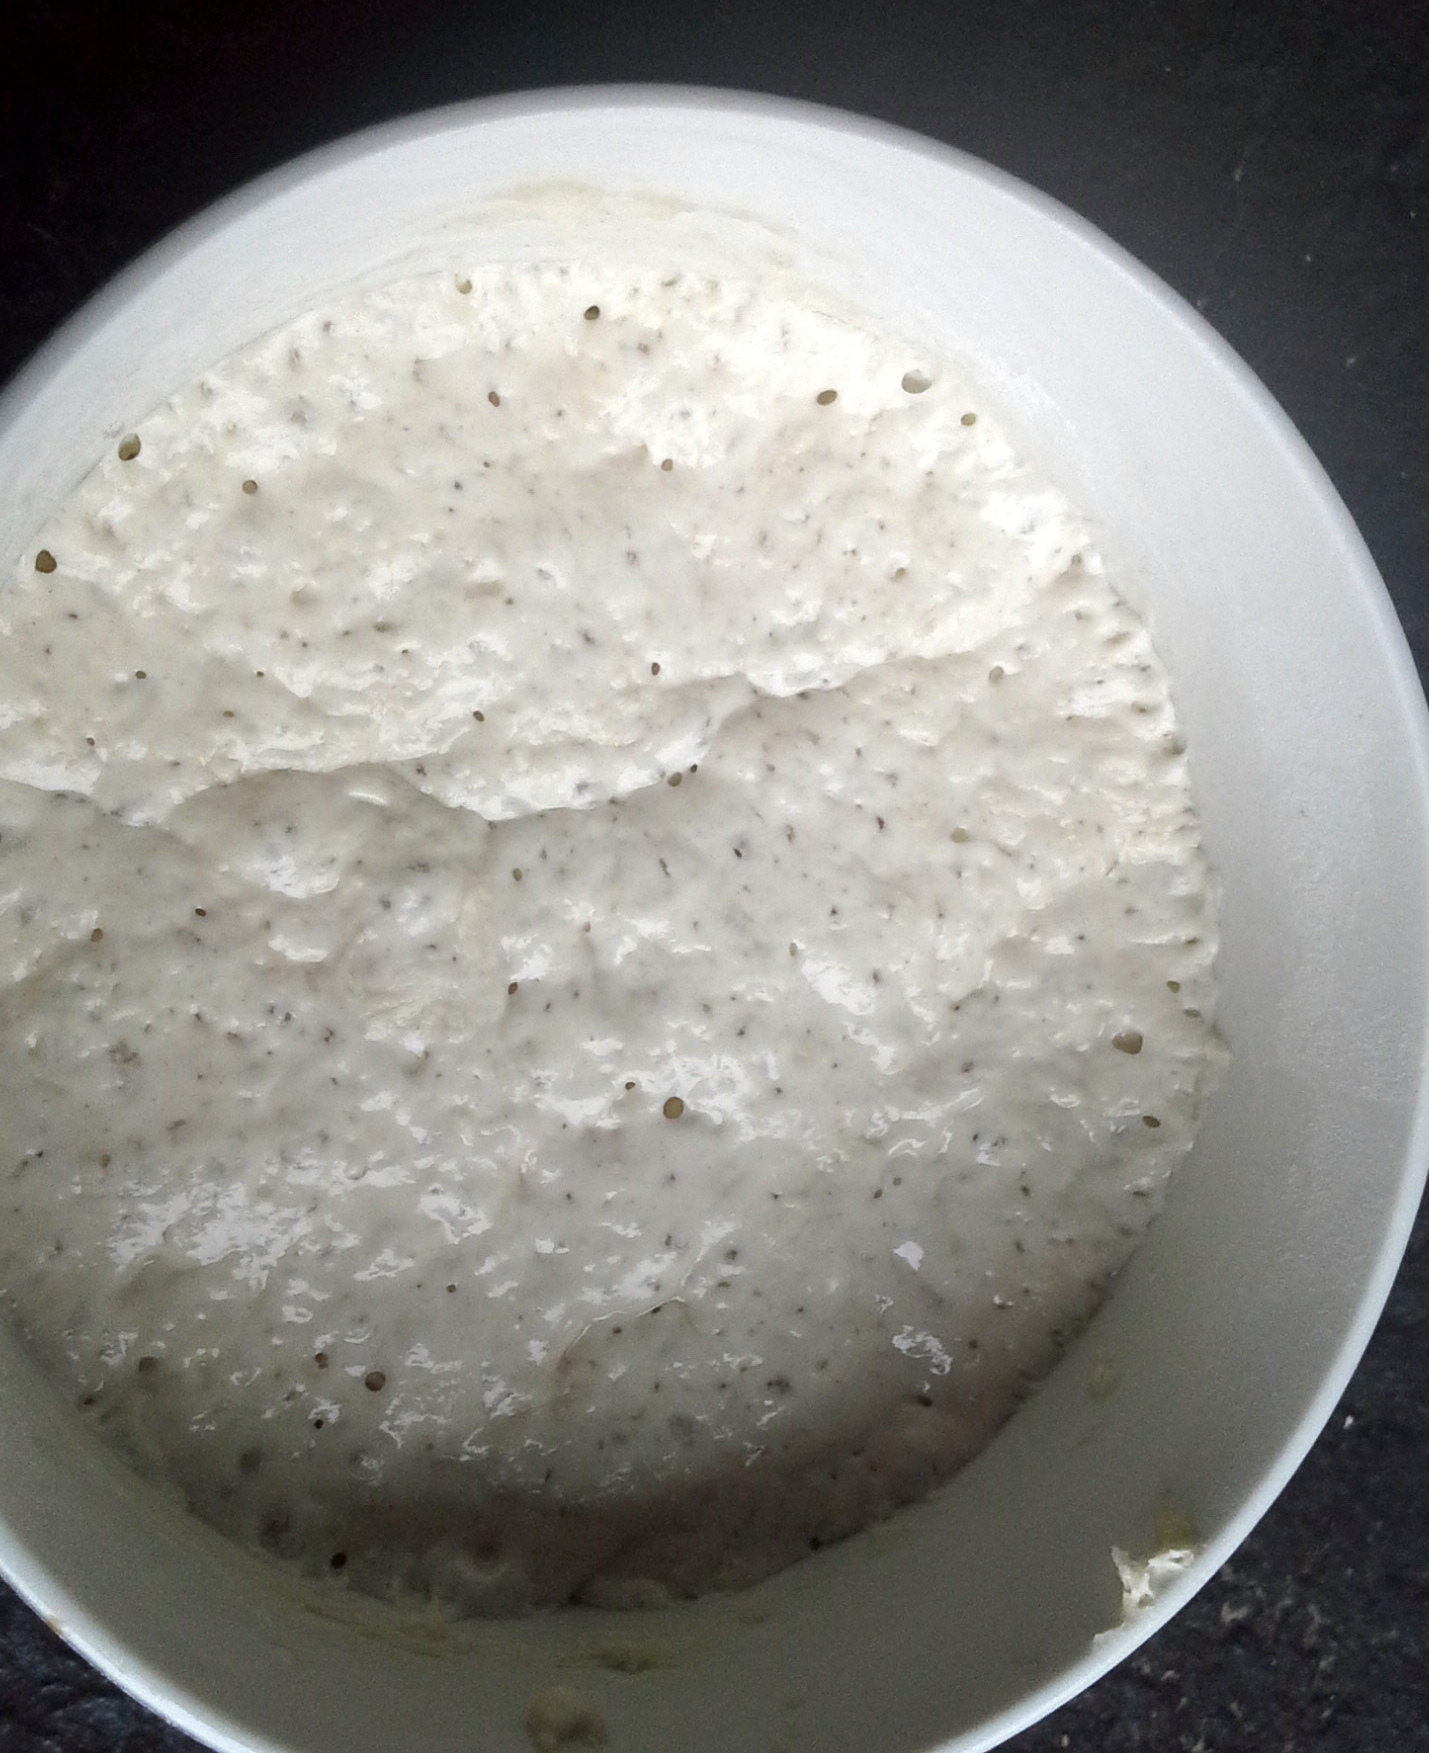
All kidding aside, this is a fantastic bread and so worth the time and effort. I wouldn’t say that this is a beginner’s bread, since it is a very wet dough (I think that Cathy  said 90% hydration), but I wouldn’t be scared of giving it a go either. All that moisture creates a light, chewy bread with lots of air pockets. there is no kneading, just folds at 45 minute intervals. I love prunes (or should I say “dried plums”) so I upped the quantity, but another dried fruit would work fine. Or olives. Or roasted garlic.

(later on…)BBBuddy Badge May 15

So now that the bread is baked and has cooled (perfect time to take my daughter to dance class), all I can say is “Delicious”!, but I better hurry since one loaf is already gone and another is half eaten. Even my daughter loved it. Except I told her it was plums in the bread (Why do prunes get such a bad rap?)

So, all I can say is Bake On!

DSC_0561

Flaxseed and Prune Ciabatta-Style Loaves


Poolish:

(I improvised here and did 85 grams 100% hydration starter, 85 grams flour, 85 grams water, and a tiny pinch of yeast.  It sat for 10 hours before moving forward)

  • 125 grams / ~ 1 cup bread flour or all-purpose flourDSC_0557
  • 125 grams / 1/2 cup water
  • pinch of instant yeast

Mix all ingredients until well incorporated with D.D.T. of 70°F.
Allow to ferment 12 – 14 hours at room temperature (65 -70°F)


Flaxseed soaker:

This makes the seeds more easier to digest. You will notice that the mixture gets very gelatinous, which is normal.

  • 48 grams/ 1/4 cup + 1 T flax seeds
  • 72 grams / 1/3 cup water

Mix all ingredients until well incorporated, cover and set aside.
Let it sit for at least one hour.

DSC_0562

Final Dough:

  • 300 grams / ~ 2 1/2 cups unbleached all-purpose flour or bread flour
  • 50 grams / ~ 1/3 cup coarsely  whole wheat flour
  • 25 grams / 1/4 cup coarsely  whole rye flour
  • 278 grams / ~ 1 1/4 cups water
  • 10 grams / 1 3/4 teaspoons salt
  • 84 grams / ~1/2 cup prunes (I used 140 g)
  • 2 grams / ~3/4 teaspoon instant yeast (I used 1/4 tsp)

Mixing: Hand Mix

  1. Mix together all the ingredients except the flax seeds, and plums.
  2. Once everything is thoroughly incorporated, mix in flax soaker and dried plums.
  3. Transfer the dough into an oiled container.

Dough Temperature: 76-78°FDSC_0565

First Fermentation: a total of 3 hours with 3 folds

  • 45 minutes at room temperature; fold
  • 45 minutes at room temperature; fold
  • 45 minutes at room temperature; fold

At this point I covered the dough bowl and placed it in the fridge overnight for a nice slow rise

Divide: Dough is not scaled. It is divided by measurement (i.e. eyeballing the dough).

Place loaves on a floured couche, proofing board or a baking sheet lined with parchment.

Rest : 20 minutes at room temperature

Preheat Oven: to 475°F with a baking stone on the bottom rack and a steam pan or iron skillet on the top rack of the oven.

Transfer loaves to baking stone: Carefully transfer the loaves from the baker’s couche (or proofing board) to the preheated baking stone.

If you proof the loaves on parchment, which is what I did, just transfer the loaves (parchment and all) to the baking stone and remove the paper partway through the bake cycle.

Quickly add several ice cubes to the steam pan (I just added a cup of water), spritz the loaves with water (oops, I forgot that) and immediately turn the oven down to 450 degrees F.

Bake: 15 minutes, then rotate the loaves for even baking and bake an additional 10 – 15 minutes or until done. They should be a rich, dark color. I turned my oven off, cracked the door ajar, and let them sit for another 10 minutes.

Let cool completely.

DSC_0566

Read Full Post »

DSC_0118

Irish soda bread muffins,  that is.

On St. Paddy’s day, I am always reminded of the  “holiday” cards my mom would get from the O’Wileys or the O’Gormans. Her friends always adding the “O'” to their last names to get in the spirit of things. I also remember my mom making corned beef and cabbage back when I was in grade school. I haven’t eaten beef since I was 12 yrs old but I was just telling my husband yesterday that I remember it tasting SO good. While he won’t be having that tonight I did just buy some Guinness beer and will make him a beef irish stew. As for me, I have already had a delicious irish soda bread muffin with my morning coffee.

These are super fast and easy to put together. Since they are baked in a muffin tin the baking time is only 20 minutes. The size is perfect. One went in my daughters lunch box, another wrapped up for her teacher.

Back in the day, for a few years I had an office that overlooked 5th Avenue in Manhattan and had the annual St. Patrick’s Day parade pass under my window. The streets would be filled with many drunk folks and after work I am sure I was one of them too. Never green beer though. Now I bake muffins. O’ the times they are a changin’….

Bake On!

IRISH SODA BREAD MUFFINSDSC_0113
Yields 12 muffins

1 1/2 cups (177 g) AP Flour
3/4 cup (85 g) whole wheat flour
2 tsp baking powder
1/4 teaspoon baking soda
1/2 teaspoon salt
1/3 cup (74 g) granulated sugar (I actually used 1/4 c)
1  cup (135g) currants
1 teaspoon caraway seeds, or to taste
1 large egg
1 cup (8 oz)  buttermilk
1/3 cup (2 3/8 oz) canola oil

Preheat your oven to 400 F and line a muffin tin with papers.

Whisk together all of the dry ingredients.
In a separate bowl, whisk together the wet ingredients (egg, buttermilk and oil) wet

Pour the wet ingredients over the dry and give a few quick stirs with a large spoon to combine everything. Do not overmix! As with all muffin recipes, this only toughens the dough. It will be a thick batter. Fill each muffin tin 3/4 of the way full and sprinkle with some course sugar (I used green).DSC_0115
Bake for 20 minutes or until light golden brown. Flip them out of the pan so the bottoms don’t get soggy. Let cool slightly before digging in.


The leprechaun catcher…….
DSC_0121-002


Recipe adapted from King Arthur Flour

Read Full Post »

Kouign Amann

DSC_0049

So that 4 mile walk I did this morning? Down the drain after digging into these gorgeous, caramelized morsels of pastry. Can you stop at just one? I dare you. I double dog dare you. Holy cow, these are unbelievable. I am on a sugar high right now and probably on the verge of diabetes (just kidding)….

Lien of Notitie van Lien has chosen the French pastry Kouign amann (pronounced “queen a-mahn”) and it  hails from Brittany, France. It’s kind of like a croissant but also  a palmier, with layer after layer of buttery, flaky pastry on the inside, yet caramelized with sugar on the outside. Pure heaven.

DSC_0063

It’s the 7 year anniversary for the Bread Baking Babes and as a tag along buddy I wanted to share in their celebration.BBBuddy Badge Feb 15

Since I have been quite lazy about posting anything I really felt it was about time I got back on the bandwagon and here is the perfect opportunity. . Even though, I have been quiet as a mouse I still have been baking along with them.

Last month was chapatis

DSC_2441


December was a yummy nutella bread ( It was so much fun I made it twice)

nutella

So I start getting my ingredients together and get the scale out. I weighed the butter and realize that my butter is underweight. I weigh it again. A pound of butter should be 452 grams and I am coming up at 260. What???  I am ready to write the butter company telling them they ripped me off when my husband asks about my digital scale. Mmmmm…. I just changed the batteries so it can’t be that. so I put 8 oz of water on the scale and sure enough…4 1/2 oz. I have never heard of a digital scale going wacko like this, I figured it would just stop one day. So, no scale for now. Oh well…

DSC_0070

And now onto this lovely, layered treat. It is a laminated dough, which just means that butter (and lots of it) is incorporated into the dough through layers so when it goes into the hot oven the steam from the butter puffs up the dough to amazing heights. For some strange reason, I adore making laminated dough. The first time I made puff pastry though, it was not so pretty, not to mention a waste of butter. A few more tries, and a few more pounds of butter, and now I love it.The multi day process of making croissants is actually fun and I look forward to making them. By comparison, these were a breeze to make. I still made them over two days but that was just because it fit better into my schedule. That is the beauty of laminated dough. You must let it rest for at least 30 minutes between each “fold”. Fear not, you can easily make and enjoy these in one day though

This is a great recipe to try for your first go at a laminated dough and if you are anything like me, it won’t be your last.DSC_0056

Now word on butter. I always buy unsalted butter. I love salt, but I like to add my own. I always keep a few pounds on hand tucked away in the freezer. For laminated dough it is recommended that you use good European style butter. It has a higher butterfat content and less moisture. It is also very expensive. I admit I do not spend the money on it. Instead I soften my butter that is needed for the recipe and cream in some flour. For this recipe I used about 3 tablespoons.

For laminated dough’s you also need a “butter block”. This is just butter formed into a square so that it fits into the center  of the dough, which is then wrapped around it and rolled out. My foolproof  way is to line a square cake tin and line it with cling wrap, overhanging it on the sides. I then take my softened flour butter (see above) and press it into a plastic lined square pan, using the overhang as a shield between my hands and the butter and making an even surface. this now gets popped back into the fridge to chill until needed. So easy and convenient. For this recipe I used a 6 inch cake pan.

Since Thursday was national pistachio day, I inserted some pistachio paste into the center of some of them. I also upped the sugar by using some Belgium sugar in the final fold.

BAKE ON!

Equipment and preparation: for this recipe you will need a 12-cup muffin tin and a freestanding mixer fitted with a dough hook. I made 6 large ones using my muffin tin and 18 petit ones using a mini muffin tin. It was for portion control. It didn’t work…

KOUIGN AMANN

1-2 hours preparation time
30 mins to 1 hour cooking time
300-340 g strong plain flour (I used 2 1/2 cups unbleached AP flour)
5 g fast-action yeast (1 1/2 tsp SAF gold)
3/4 tsp salt
200 ml  warm water (roughly 3/4 cup)
25 g unsalted butter, melted (2 tablespoons)
250 g cold unsalted butter, in a block (1/2 pound)
100 g caster sugar for sprinkling on the dough (the final fold just before rolling it out and after it’s been rolled out – not between the other layers), plus extra for sprinkling on top (1/2 cup)

Put the flour (start with 300 g) into the bowl of a freestanding mixer fitted with a dough hook. Add the yeast to one side of the bowl and the salt to the other. Add the water and melted butter and mix on a slow speed for two minutes, then on a medium speed for six minutes. Add a little extra flour if the dough is too sticky. The dough should be soft but not sticky (so don’t add too much).

 Tip the dough onto a lightly floured work surface and shape into a ball. Put into a lightly oiled bowl. Cover with cling film and leave to rise for one hour. Prepare your butter block (6×6 inch square) and chill until needed.
DSC_0031
 On a lightly floured surface, roll out the dough to a measure 7 x 14 inches. Place the butter at one end leaving about 1 inch at the edge and then fold the  other half of the dough over it. Pinch the edges firmly to seal in and encase the butter block.  I find this much easier than the standard “envelope” method.DSC_0033
 Roll the dough into a 6 x 18 inch rectangle. Fold the bottom third of dough up over the middle, then fold the top third of the dough over. You will now have a sandwich of three layers of butter and three layers of dough. Wrap in cling film and place in the fridge for 30 minutes. This completes one turn.
DSC_0035           DSC_0036
Repeat this process twice more, so you have completed a total of three turns, chilling the dough for 30 minutes between turns. On every turn rotate the dough before you begin rolling it out. In other words, if you end a fold with the two sides seams horizontal, then after the 30 minute rest when you begin rolling again the two sides seams should now be vertical.
DSC_0037

Roll the dough into a rectangle as before. Sprinkle the dough with 1/4 cup  sugar and  fold into thirds again. Working quickly, roll the dough into a large 12 x 16 inch rectangle. Sprinkle the dough with the remaining 1/4 cup  sugar and cut the dough into 12 squares.DSC_0040

Grease a 12-cup muffin tin well with oil. Gather the dough squares up by their four corners and place in the muffin tins, pulling the four corners towards the centre of the muffin tin, so that it gathers up like a four-leaf clover. Press these corners well together, they can open up when unattached to each other (as mine did) Sprinkle with some more sugar and leave to rise (room temperature), covered with a clean tea towel, for 30 minutes until
slightly puffed up.DSC_0042
 Preheat oven to 425 F.
Bake the pastries for about 20-25 minutes, or until golden-brown. Cover with foil halfway through if beginning to brown too much (and they will). Remove from the oven and leave to cool for a couple of minutes before turning out onto a wire rack. Be careful not to burn  yourself on the caramelized sugar, but don’t leave them to cool for too long, or the caramelized sugar will harden and they will be stuck in the tin. Serve warm or cold. Warm is best!
DSC_0046
If you don’t want to eat them all in want go (of just if you want to, but shouldn’t), bag and freeze them.  Before you eat them: Defrost them and place them in a warm oven (275 F ) for about 4-6 minutes or until warm, they will crisp up again.
 DSC_0050

Read Full Post »

DSC_1623

Okay, it’s been a few months since I participated as a buddy with the Bread Baking Babes. Enough already. The funny thing is that I have actually baked the bread every month….

Polenta Bread

DSC_1448


Historical Bread

DSC_1532

BBBuddy Badge Oct 14


So this month, Katie, from Thyme for Cooking chose a delicious bread that is meant to be eaten from the oven. Mmm….who doesn’t love warm bread oozing with gooey cheese??? Since it is just days before Halloween I made my version  a spooky blend of sourdough, pumpkin,roasted garlic (to ward off the vampires), onions carmelized with blood-red balsamic vinegar, and orangey cheddar cheese. Half was gone 20 minutes out of the oven. Enough said.

Please visit Katie’s site for the original recipe!

Make 1 large loafDSC_1621

3 oz  active 100% hydration starter
4 oz (1/2 c) pumpkin puree
1 tsp instant dry yeast
2 oz (1/4 c) water
1 egg
1 egg yolk
4 oz whole wheat flour
6 oz AP flour (I had to add another tablespoon of flour)
3/4 tsp salt

Mix the starter, yeast, water and pumpkin puree together in a large bowl. Add  the flours and salt. Knead together for 10 minutes. Let rise until doubled, about 2 hours. Punch down and place in the fridge overnight in a bowl covered tightly with plastic wrap.

Meanwhile, make the filling…DSC_1604

2 heads garlic, roasted and the cloves peeled
1 tablespoon olive oil
2 medium onions, thinly sliced
2 teaspoons dried thyme
2 teaspoons finely chopped fresh rosemary
1 tsp salt
2 tablespoons balsamic vinegar
1-2 tablespoons Dijon mustard
1 1/2 cups sharp cheddar cheese

1 egg, beaten (for a wash)

Heat the olive oil in a large frying pan over medium low heat and sauté the onions until soft. Add the herbs, the roasted garlic, and the balsamic vinegar; continue to cook for another 5 minutes. Set aside to cool completely.

The next morning…..

Take the bread dough out of the fridge and roll it into a rough 10 x 13 inch rectangle. Spread the mustard down the center in a strip, leaving about a 1 inch border at the top and bottom. Pile the onion/garlic mixture over the mustard strip then sprinkle liberally with the cheese, saving a small amount to sprinkle over top.

DSC_1612

Using sharp knife and starting at 1 corner of dough, make diagonal cuts 1 inch (2.5 cm) apart almost to filling to form strips along 1 long side of dough. Repeat on other side, cutting diagonal strips in opposite direction.Alternating strips from each side, fold strips over filling to resemble braid, overlapping ends by 1 inch (2.5 cm) and brushing with some of the egg to seal. (which I totally forgot to do)

DSC_1613

Cover with towel; let rise in warm place for 1 hour or until doubled in bulk.

Brush with the beaten egg .and place in your preheated oven for about 25 minutes then pull it out and sprinkle with the remaining cheese that you saved. Bake for another 5-10 minutes. Serve warm (or let cool completely).


You could also sprinkle the bread with black sesame seeds and paint a goblin face on the bread for a Halloween treat. My 8 year daughter loved it.

Happy Halloween

DSC_1618

Read Full Post »

DSC_1558

Since I skipped the last two Daring Bakers Challenge’s I was determined to get back in the swing this month. The September challenge was hosted by Lucie of Chez Lucie and she chose a traditional Czech pastry called Kolache. We were given thee different versions to try: Pražský koláč (Prague Kolach), Chodské koláče (Kolache from Chodsko), and   Dvojctihodné/Moravské koláče (Two Fillings/Moravian Kolaches) .   According to Wikipedia, Montgomery, Minnesota is the kolacky capital of the world. Who knew?? Maybe because they are so tasty….

DSC_1561

I made the Prague Kolache two weeks ago for a dinner we had with friends. I really was incredibly simple to put together and was light and delicious. When people ask for seconds I know it’s a winner. I could have eaten the whole thing myself. It’s essentially a large, round bread filled with a lightened pastry crème. For mine I chose to make a homemade butterscotch pudding for a little added flavor but the original calls for a simple custard. Do what floats your boat (or what you have on hand).

The Moravian Kolaches are little pillows of dough filled with a lightly sweetened quark and topped with a fruit jam.   Since I didn’t have any quark I used sour cream that I strained for 24 hours to thicken it. Again, make it work for you. I cheated on the third version by using some of the leftover dough and filling from the morovian version (see the  photo above). Please stop by Lucies blog to see her great step by step photos of all three versions.


While I really liked every version, the Prague version was hands down the winner, both for flavor and ease of preparation. Please try them and get back to me which was your favorite. Bake on!

DSC_1522


Ingredients
for cake:
1¾ cups (420 ml) (9 oz) (250 gm) all-purpose (plain) flour
½ cup (120 ml) (125 gm) mayonnaise (store-bought or home-made), room temperature (yes, mayonnaise)

2 tablespoons (30 ml) (1 oz) (30 gm) granulated sugar
1 small egg, room temperature
15 gm (½ oz) fresh yeast or 1 packet (2 teaspoons) (7gm) dry active yeast
5 tablespoons (75 ml) milk, warm
½ teaspoon (3 gm) salt
for the pastry cream:
2 cups (500 ml) milk, divided
½ cup (120 ml) (3½ oz) (100 gm) granulated sugar plus 1 tablespoon (½ oz) (15 gm)vanilla sugar
½ cup (120 ml) (2-2/3 oz) (75 gm) vanilla pastry cream powder (such as Birds)
1 stick (½ cup) (4 oz) (125 gm) butter, room temperature
5 tablespoons (75 ml) heavy whipping cream, chilled
for streusel topping:
1/3 cup (1¾ oz) (50 gm) plain flour
¼ cup (60 ml) (1¾ oz) (50 gm) butter, chilled and diced
¼ cup (60 ml) (1¾ oz) (50 gm) caster (or granulated) sugar
½ teaspoon (2 gm) ground cinnamon
for finishing:
1 small egg, lightly beaten

Directions:
In a bowl of your stand mixer, sift flour and make a hole in the middle. Crumble the yeast into the hole, add 1 teaspoon sugar and about 3 teaspoons warm milk. Mix yeast, sugar and milk with fork and lightly sprinkle the surface with flour. Cover the bowl with towel and let rise for 10-15 minutes. Add rest ingredients (mayonnaise, sugar, milk, egg and salt) and knead with dough hook on low speed for 10 minutes, until you have smooth dough. If you are using instant yeast, it is okay to place everything into the bowl at once.

Turn the dough onto a lightly floured surface. Cover with towel or plastic wrap and let rise for about an hour to double in volume. Form the dough into a ball and place it onto the baking sheet lined with parchment paper. With your palms and fingers press the dough and shape it to disc about 20–25 cm (8-10 inch) in diameter and 2–3 cm (¾-1 inch)thick. Let rise for 30 minutes.

Meanwhile preheat your oven to moderate 320°F/160°C/gas mark 3 .

Make the streusel topping. In a medium bowl, mix together sugar, flour and cinnamon. Add cold butter and with your fingers, mix all ingredients until crumbly. Brush the cake with the beaten egg and sprinkle with generous amount of streusel topping. Bake for 20 minutes until golden brown. Let cool on a wire rack.DSC_1517


Prepare the pastry cream.
In a small bowl, mix well ½ cup (125ml) milk with the vanilla pastry cream powder. Set aside. In a saucepan, mix the rest of the milk 1½ cup (375ml) with the sugar and vanilla sugar and bring it to boil, stir occasionally. Add the milk-pasty cream powder mixture and boil for 3 – 5 minutes, stirring constantly.
Transfer the mixture into a bowl of your standing mixer fitted with paddle attachment and let cool completely, while stirring constantly on a low speed. Add diced butter and mix together.
Separately whip the double cream until stiff. Mix with vanilla cream.

Don’t be ashamed to use boxed vanilla pudding!

Cut cooled cake lengthwise and spread the cream onto the bottom part. Cover with upper part. Cut into 8 to 10 pieces


DSC_1554


MORAVIAN KOLACHES

Servings: about 30 small or 10 large kolaches 


Ingredients
for dough
3-2/3 cup (880 ml) (17-2/3 oz) (500 gm) all-purpose (plain) flour (use semi-coarse grounded if you can find in your store)
¾ cup (180 ml) (3½ oz) (100 gm) confectioner’s (icing) sugar
1 cup (250 ml) milk, warm
1/3 cup (80 ml) (2-2/3 oz) (75 gm) butter, melted
30 gm (1 oz) fresh yeast or 2 packets (4 teaspoons) (½ oz) (15 gm) active day yeast
pinch of salt
2 small egg yolks
for quark fillingDSC_1541
3 cups (1-2/3 lb) (750 gm) quark
1 small egg yolk
confectioner’s (icing) sugar to taste
for plum filling
2/3 cup (160 ml) (7 oz) (200 gm) plum jam
rum or hot water to soften jam if too thick
for streusel topping
1/3 cup (1¾ oz) (50 gm) plain flour
¼ cup (60 ml) (1¾ oz) (50 gm) butter, chilled and diced
¼ cup (60 ml) (1¾ oz) (50 gm) caster (or granulated) sugar

for finishing
1 egg, lightly beaten

Directions:
In a bowl mix together yeast and 1 teaspoon sugar. Add 4 tablespoons (¼ cup) warm milk, mix well and sprinkle with 1 tablespoon flour. Cover with plastic wrap and let rest for 10 – 15 minutes. (Skip this if you are using instant yeast. I used SAF Gold. Everything goes in the bowl together)
In a bowl of your electric mixer (or in a large bowl) mix flour, sugar, salt, egg yolks, butter, milk and leavened yeast. Knead with dough hook (or with wooden spoon) on low speed for about 10 minutes. Cover with plastic wrap and let rise for about one hour to double its volume.

Prepare quark filling – just mix all ingredientsDSC_1540

and

plum filling – mix plum jam with rum or water to soften it. Set aside.


Prepare streusel topping. In a medium bowl, mix together sugar, flour and cinnamon. Add cold butter diced in small cubes and with your fingers, mix all ingredients until crumbly. Alternately,  in a saucepan melt the butter, add flour and sugar at once and mix with fork until crumbly. Set aside.


When the dough is risen turn it onto a lightly floured surface and roll it with rolling pin to a thickness of about 2 cm (¾ inch). Cut with 10cm (4 inch) cookie cutter or just with a glass (if you want small kolaches) or divide the dough into 10 equal pieces (if you want large kolaches). Flatten each piece with your hands and fill with about 1 rounded teaspoon of  quark filling. Wrap it into a “purse” shape and pinch all the seams to seal.Preheat oven to moderate 340°F/170°C/gas mark 3. Line 2 – 3 baking sheets with parchment paper. Put each kolach onto a prepared baking sheet with seam down. Press each kolach in the middle to make an indent. Brush it with egg wash and fill holes with plum filling. Sprinkle it with streusel topping. Bake for about 20 minutes to golden brown.

Sept 14, 2014


Storage & Freezing Instructions/Tips:
All kolaches are best the first and second day but you can store them in an airtight container in a fridge up to 3 (Prague kolach) or 5 (Chodske and Double filling kolaches) days. You can also freeze Prague kolaches WITHOUT filling in a freezer for one month.

Additional Information:
Some additional recipes, in Czech:
http://dolcevita.blog.cz/0707/grandiozni-ceske-kolace
http://dulique.blogspot.cz/2010/01/sweettoothday-prazsky-kolac.html
http://www.svasniprojidlo.cz/2014/05/prazsky-kolac.html
http://www.ceskatelevize.cz/porady/10084897100-kluci-v-akci/206562221900…

Read Full Post »

20140724_163503


This is going to be short. I just finished writing this post up (the past hour) and just lost it all. Arrggghhhh…..

Just bake this bread.

Adapted from The Fundamental Techniques of Classic Bread Baking from The French Culinary Institute. 

The source of the story about the origins of Panmarino is found here

According to Cathy’s research, it originated in the area called Ferrara, near Venice and was created by a baker named Luciano Pancalde.

The idea for Panmarino came about as Luciano was reading the chronicles of the d’Este family who once ruled Ferrara. When he learned about the magnificent court banquets where they served rosemary bread with a crust that “sparkled with diamonds,” it gave him the idea to create his own loaf. He experimented and baked and tested some more until finally, he had the bread he was aiming for, an aromatic, dome-shaped bread that is scored in the pattern of a star and sprinkled with salt crystals.

20140724_122355

*A few personal notes:

The recipe calls for 23 grams of salt which works out to be almost 2 tablespoons. I thought it was a typo but no, it is correct. It turns out that the bread did not taste salty at all. Next time though I will decrease the salt by 3/4 teaspoon and use the leftover salt to sprinkle over the tops.

It takes about 14-16 hours to make the biga so plan ahead

I am in New York for the summer, staying at my mom’s house. so I have no baking stone, no couche, no lame. So what.

These were proofed and baked on a regular baking sheet with parchment paper. I spritzed the loaves with water 3 times in the first 5 minutes for steam. The crusts came out beautiful. I’m saying this because there is no excuse not to bake your own bread.

I doubled the amount of rosemary called for in the recipe. I like rosemary.

This recipe yields 4 small loaves, perfect for sharing or freezing, or you could make 2 larger loaves instead.


Panmarino

makes 4 small loaves


Biga:
  • Bread flour 143 grams/5 ounces
  • Water 122 grams/4 1/4 ounces
  • Pinch of instant yeast

Final Dough:

  • Bread flour 884 grams/1 pound 15 ounces
  • Water 477 grams/1 pound 1 ounce
  • Milk 44 grams/1 1/2 ounces
  • Biga 265 grams/9 1/3 ounces
  • Salt 23 grams/3/4 ounce
  • Pinch of instant yeast
  • Olive oil 88 grams/3 ounces
  • Chopped fresh rosemary 9 grams/1/3 ounce

Prepare the Biga:

Combine the flour, water and yeast in a mixing bowl. Stir with a wooden spoon or Danish dough whisk until well blended.  Scrape down the bowl, cover with plastic wrap, and let it rest at 75 degrees F. for 14 to 16 hours.

20140724_120403

Making the  Dough:

Combine the flour, water, milk, and biga in the bowl of a stand mixer. Using the dough hook, mix on low speed until blended.

Add the salt and yeast and mix on low speed for 5 minutes. Increase the speed to medium and mix for about 7 more minutes, or until the dough is smooth.  When the gluten is fully developed, mix in the olive oil and rosemary on low speed.

Lightly oil a large bowl. Scrape the dough into the bowl and cover with plastic wrap. Let the dough ferment for 45 minutes.

Remove the dough to a lightly-floured work surface and divide it into four (or two if you halved the recipe) 450-gram /16-ounce pieces. Shape the dough pieces into rounds. Cover with plastic wrap and let them bench rest for 15 minutes.

Place two couches on a separate work surface or bread board and dust them with flour.

Uncover the dough and, if necessary, lightly flour the work surface. Gently press on the dough to degas and carefully shape each piece into a tight and neat rounds.  Place one loaf on one side of the couche, fold the couche up to make a double layer of cloth to serve as a divider between the loaves, and place a second loaf next to the fold.  Repeat the process with the remaining two loaves and the second couche.  Cover with plastic wrap and proof for 1 hour.

About an hour before you plan to bake the loaves, place a baking stone (or tiles) into the oven along with a steam pan (underneath) or iron skillet (on the top rack) and preheat the oven to 450 degrees F. See my notes above*

Uncover the dough and score the top of each loaf in a star pattern using a lame or sharp knife.

Optional: sprinkle sea salt into the crevices as the original baker did to make it “sparkle with diamonds.”

Carefully transfer the loaves (on the parchment paper) to the preheated baking stone using a peel or the back of a baking sheet. To make the steam, add 1 cup of ice to the iron skillet or steam pan. 

Bake for 40 minutes, or until the crust is light brown and crisp and the loaves make a hollow sound when tapped on the bottom.

Remove the loaves from the oven and transfer to a wire rack to cool. 

20140724_170111


Check out how the Real creative Babes handled this bread:

The Bread Baking Babes (current dozen) are:


Read Full Post »

DSC_1207

Well, I’m late for posting the Bakers Challenge. Again.  I love to volunteer at my daughters school and the past few weeks have been quite hectic with end of school field trips and activities. Please forgive me.

This  month’s challenge was hosted by Shelley of C Mom Cook. She asked everyone to make cinnamon buns, or one its many variations. And there are tons. I think cinnamon rolls was one of the first breads that I ever made and   there is something so comforting about rich, warm bread filled with sugary goodness and covered in more sugary goodness. If you have never tried making these (or some version of them), please don’t hesitate to try. It’s  really quite simple.

The basic concept of a cinnamon roll is yeasted dough rolled out into a rectangular shape, then brushed with a good dose of butter. A cinnamon sugar mixture is then sprinkled over this and then the dough is rolled up and sliced. the slices are place, cut side up, in a pan to  rise and then baked.

What is the difference between a “cinnamon” bun and a “sticky” bun? The first is drizzled with either a cream cheese or confectioners sugar glaze when still warm from the oven while a sticky bun has a butter/sugar mixture in the bottom of the pan that sliced dough gets placed into for their final rise. basically the extra sugary goodness goes in either before baking or after. In mine I did a little of both!

A variety of doughs can be used. An enriched dough is most common. All that means is that the dough has some butter and eggs in it. Sourdough is ultra tasty. Brioche dough is crazy wonderful for this (lots  of added butter and eggs in the dough). Hell, let all thoughts of calories go out the window and use puff pastry. While this is more like a cronut it still counts as a cinnamon bun to me (and my thighs).  Don’t let the thought of making bread dough frighten you. It is one of the most rewarding things you can do in the kitchen. That being said , I have at times used plain old white bread dough bought from the freezer section at the market and made sticky buns with delicious results. Seriously, all paths lead to the same end. Deliciousness.

I baked a few versions this month. First I went with one with a filling of cinnamon, candied orange peel and walnuts. I know my friend Kathy is cringing right now at the thought of candied orange peel but I love it.  Later in the month I made little mini cinnamon buns for the volunteer appreciation night at the grade school. For these I just made a half batch of dough and rolled a skinnier rectangle so that when I rolled it up it only rolled 1 1/2 turns and then I cut 1/3 inch slices. I hope that makes sense. These were good and went quickly due to their manageable size. Nobody wants to be at a school gathering trying to eat a mammoth sized pastry in front of strangers. That is something better left for home.

DSC_1183

For my final version I went with a rhubarb and custard filled sticky bun. My rhubarb plant outside is gigantic and I need reasons to use it. I used Bird’s custard after reading in a food history book about how Birds came about. It turns out that during WWII families in England were rationed one (yes, 1) egg per week so the manufacturers came up with a product that required no eggs and very little sugar, which was rationed as well. Since I keep a can in the closet for when the urge to make Nanaimo bars strike, this seemed perfect. Well, actually, I used the last of my eggs to make the dough and didn’t feel like going out to get some more….

The best part about making cinnamon/sticky buns? other than eating them, is that you can prepare them the day before and slip the pan of unrisen slices in the fridge until morning. You just wake up, turn your oven on, and let the cold rolls warm up a bit on the counter while your oven heats up. I find that even 15 minutes at room temperature is enough before popping them into the oven.

Please make sure to visit Shelley’s site to see her tasty versions. BAKE ON!

 Dough

3 ¼ to 3 ½ cups all-purpose flour
2 tbsp sugar
2 ¼ tsp instant yeast (if using active dry yeast make sure to proof it first)
½ tsp salt
1 cup of  milk, heated to just around 100F  (I used 2%)
2 large eggs, at room temperature
1 tsp vanilla extract
½ cup unsalted butter, at room temperature


Stir three cups of the flour, sugar, yeast, and salt in a stand mixer fitted with the dough hook or in a large mixing bowl.

Add the milk, eggs ,vanilla  and butter to the dry ingredients and continue mixing until the dough comes together.  If necessary, add the remaining flour, a little at a time, until the dough is smooth and not sticky to the sides of the bowl. Continue to knead for about 5 minutes.

Place the dough into a lightly greased bowl and cover with cling wrap or a tea towel until it has doubled in bulk. This should take about hour. If it is very hot in your house this might be shorter or if your house is cool it could take a little longer.

Meanwhile, prepare the filling.

Rhubarb:

Take 4-5 stalks of fresh rhubarb and cut them into 1/4 – 1/3 inch slices. Add  1/2 cup sugar (or more to taste) . Mix this together and let it macerate until ready to use.DSC_1193

Custard:

1 1/2 Tablespoons (22 ml) Bird’s custard powder
1 1/2 Tablespoons (22ml) granulated sugar
1 cup  (250ml) milk
1/2 vanilla bean, seeds scraped out (save the pod for your sugar or salt jar) or 1 teaspoon rum


In a small saucepan, mix together the custard powder and the sugar. Over medium high heat, whisk in the milk until well blended. If using the seeds of a vanilla bean, add it now. Bring to a full boil, whisking frequently. Take off the heat. If using rum, add now. Place the hot custard into a bowl and place a piece if cling wrap directly onto the surface to prevent a “skin” forming. Cool in the fridge while the dough is rising.


Get your pan ready:

In a 12 hole muffin tin, place 1/2 teaspoon each of butter and brown sugar. Place in a warm oven for a few minutes to slightly melt the two.

Set aside .

June 28, 2014


Assembly:

Roll out your dough onto a lightly floured surface. Make a rectangle roughly 12 x 9 inches. Feel free to eyeball this. Spread a layer of cooled custard over the dough leaving about 1/2 inch border all the way around.

Lightly drain your rhubarb, reserving the pink liquid for your glaze (optional)

Sprinkle the rhubarb over the entire surface . With the wide end facing you, start rolling up your dough, jelly roll style. Pinch the seam together and slice into Twelve 1 1/2 inch slices. Place cut side up into each muffin cup.

Cover with cling wrap and place in the fridge overnight until morning.

When you are ready to bake, take the cold pan out of the fridge and place on the counter. Remove the cling wrap. Heat your oven to 350F. After about 15 minutes, pop the sticky buns into your oven and bake for 25 minutes or until golden brown.

May 28 2014

If you are baking the same day: after placing the sliced rolls into your muffin tin, cover them with either plastic wrap or a tea towel and let them rise again for another hour before baking at 350F for 25 minutes.

If you don’t have a muffin tin, place them into a rectangle or round cake pan with a little space around them to expand.

Optional glaze:(since my daughter was having a friend sleepover this was not optional in out house)

Take 1 1/2 cups confectioners sugar and mix with 2 tablespoons of the reserved pink rhubarb syrup. If it is too thick, add a tiny bit more until you get a consistency of thick cream. When the sticky buns come out of the oven, take them out of the pan and drizzle the pink icing of each of them.

DSC_1213

This easy dough recipe is from Anna Olsen.


.

Read Full Post »

DSC_1299


I just realized that it is the end of the month and I never wrote up this post! I actually baked it last week and it was really tasty. I made the full recipe and go three large loaves out of it. We kept one loaf and the others were the perfect ” thank you ” for two friends of mine who helped me out last weekend with my daughter while we went to a wedding.  One drove her all the way across town to her gymnastics class so we could attend the ceremony and the other had her over for a sleepover. Are friends great? I know mine are and I really appreciated the help. These delicious loaves came in very handy indeed.

Karen of Bake My Day! was the host for the Bread Baking Babes this month and she chose this lovely bread. I am a poor buddy who doesn’t follow due dates very well…..

DSC_1297

For this recipe you need to start it the day before (or up to 4 days in advance if you want) since it’s one of those no/low knead doughs. The wild rice also takes about an hour to cook. I can’t believe I actually had some in the closet! It’s good stuff, I need to remember to make it more. The recipe calls for 1 cup cooked (about 1/4 uncooked) but I doubled the amount to 2 cooked cups. Other changes I made were using half whole wheat flour and also adding 3 ounces 100% starter.

this is going to be short since I am so late so BAKE ON! my friends


Wild Rice and Onion bread

6 cups (27 oz / 765 g) unbleached bread flour (I used half WW, half unbleached flour)
2 1/4 teaspoons (0.6 oz / 17 g) salt, or 3 1/2 teaspoons coarse kosher salt
2 tablespoons (0.66 oz / 19 g) instant yeast (I used 1 tablespoon and 3 ounces starter)
1 cup (6 oz / 170 g) cooked wild rice or another cooked grain (I added 2 cups)
1/4 cup (2 oz / 56.5 g) brown sugar (I used only 2 tablespoons)
11/2 cups (12 oz / 340 g) lukewarm water (about 95°F or 35°C)
1/2 cup (4 oz / 113 g) lukewarm buttermilk or any other milk (about 95°F or 35°C) (I used plain yogurt)
1/4 cup (1 oz / 28.5 g) minced or chopped dried onions, or 2 cups (8 oz / 227 g) diced fresh onion (about 1 large onion)
1 egg white, for egg wash (optional)
1 tablespoon water, for egg wash (optional)DSC_1292

Do Ahead
Combine all of the ingredients, except the egg wash, in a mixing bowl. If using a mixer, use the paddle attachment and mix on the lowest speed for 1 minute. If mixing by hand, use a large spoon and stir for 1 minute. The dough should be sticky, coarse, and shaggy. Let the dough rest for 5 minutes.
Switch to the dough hook and mix on medium-low speed, or continue mixing by hand, for 4 minutes, adjusting with flour or water as needed to keep the dough ball together. The dough should be soft, supple, and slightly sticky.
Transfer the dough to a lightly floured work surface. Knead the dough for 2 to 3 minutes, adding more flour as needed to prevent sticking. The dough will still be soft and slightly sticky but will hold together to form a soft, supple ball. Place the dough in a clean, lightly oiled bowl, cover the bowl tightly with plastic wrap, and immediately refrigerate overnight or for up to 4 days. (If you plan to bake the dough in batches over different days, you can portion the dough and place it into two or more oiled bowls at this stage.)DSC_1294

On Baking Day
Remove the dough from the refrigerator about 2 hours before you plan to bake. Shape the dough into one or more sandwich loaves, using 28 ounces (794 g) of dough for 4 1/2 by 8-inch loaf pans and 36 ounces (1.02 kg) of dough for 5 by 9-inch pans; into freestanding loaves of any size, which you can shape as bâtards, baguettes, or boules; or into rolls, using 2 ounces (56.5 g) of dough per roll. When shaping, use only as much flour as necessary to keep the dough from sticking. For sandwich loaves, proof the dough in greased loaf pans. For freestanding loaves and rolls, line a sheet pan with parchment paper or a silicone mat and proof the dough on the pan.
Mist the top of the dough with spray oil and cover loosely with plastic wrap. Let the dough rise at room temperature for 1 1/2 to 2 hours, until increased to about 1 1/2 times its original size. In loaf pans, the dough should dome at least 1 inch above the rim. If you’d like to make the rolls more shiny, whisk the egg white and water together, brush the tops of the rolls with the egg wash just before they’re ready to bake.
About 15 minutes before baking, preheat the oven to 350°F (177°C), or 300°F (149°C) for a convection oven.
Bake the loaves for 10 to 15 minutes, then rotate the pan; rotate rolls after 8 minutes. The total baking time is 45 to 55 minutes for loaves, and only 20 to 25 minutes for rolls. The bread is done when it has a rich golden color, the loaf sounds hollow when thumped on the bottom, and the internal temperature is above 185°F (85°C) in the center.
Cool on a wire rack for at least 20 minutes for rolls or 1 hour for loaves before slicing.

DSC_1301

Read Full Post »

DSC_1091

I have to admit I loved this months Daring Bakers Challenge. Why? Because even after looking at the recipe several times this month I just got around to trying it out today and was thrilled to see how fast it came together. 5 minutes to mix it together, 20 minutes in the oven and then you are rewarded with little magic puffs, crispy on the outside and pillowy soft on the inside. Oh, did I forget to mention they are filled with cheesy goodness? I would say these are the Brazilian version of French gougères. But different. And gluten-free. Isn’t that a nice bonus? This is a recipe worth keeping for when you have company over with dietary needs that you normally don’t cook for. Like gluten-free cooking. the secret ingredient is sour cassava (tapioca) starch. Made from the yucca plant, the sour tapioca starch undergoes a natural fermentation process and the texture is more granular before baking than regular tapioca flour. Our host this month, the lovely Renata from“Testado, Provado & Aprovado!”, has this to say about the starch:

“TAPIOCA STARCH (also known as CASSAVA STARCH) is the main ingredient of Pão de Queijo. Here in Brazil there are two types: REGULAR and SOUR. The regular type is easier to find in other countries, but if you are lucky enough to find the sour type in your area, I highly recommend you try it (quantities will be provided when applicable). It looks pretty much like any other starch, powdery and white, sometimes it has little granules.
You can find tapioca starch at amazon.com:
Regular Tapioca starch (tapioca flour)
Sour Tapioca Starch (this is a Brazilian brand, quite overpriced. Here in Brazil it costs around US$ 2!)”

DSC_1312
Here in Calgary I had no problem finding the sour starch at my local South American market (yes, I have a  South American market down the street). I hope that it is just as easy for you (try looking in the spanish section). Otherwise, just use regular  tapioca flour.

The second most import ingredient is cheese. The authentic recipe calls for “Queijo Minas Curado” which is typical from Minas Gerais. They did not have this at the store so I relied on what I had in the fridge, smoked applewood cheddar. I don’t know what the other cheese tastes like, Reneta compares it to Monterey Jack, but the applewood cheddar was AMAZING.

DSC_1323

These are super simple to make, and are best are best eaten straight from the oven, or warm if you can wait that long. Keep a batch of rolled dough balls in the freezer to bake straight out of the freezer. Roll smaller balls so when company pops by they are the perfect accompaniment with cocktails, or larger balls for a dinner side dish or Panini roll.

I made the traditional version, but you must visit Renata’s site to get the two other versions. If I only had a waffle iron… I also cut the recipe down to 1/4  since there was just the three of us but next time (and there will be a next time) I will make the full batch and freeze the uncooked dough balls. Bake On!

TRADITIONAL PÃO DE QUEIJO
Servings:
Yields about 80 small balls

Ingredients:

500 gm (4 cups) tapioca starch (If you have access to sour tapioca, you can use 250gm (2 cups) of each)
1 cup (250 ml) whole milk
2-3/4 tablespoons (40 ml) (1½ oz) (40 gm) butter
1 teaspoon (5 ml) (3 gm) salt (or to taste depending on how salty your cheese is)
3 cups (750 ml) (9 oz) (250gm) Monterey Jack Cheese (or another cheese of your liking, or a mix of cheeses), coarsely grated
1 to 3 large eggs

Directions:

Heat milk, butter, and salt in a small sauce pan until it comes to a boil. Watch closely as it may boil over. Remove from heat and set aside.

Sift the  tapioca starch into a large bowl.

Pour the hot liquid  mixture over the tapioca and start stirring with a fork. The milk mixture will not be enough to form a dough yet. You will have a lumpy mixture, that’s what it is supposed to be.Keep stirring with the fork, breaking down the lumps as much as you can, until the mixture cools down to warm.

Preheat your oven to moderately hot 400° F/200° C/gs mark 6

DSC_1310

Add the grated cheese to the tapioca mixture and mix well, now using your hands.

Lightly beat the eggs with a fork and add little bits until the dough comes together into a soft but pliable dough. You only have to knead it a bit, not as much as you knead a yeasted bread. It’s OK if it is slightly sticky.Form balls with the dough and place them on a baking sheet lined with parchment paper or silicon mat or lightly greased with vegetable oil. If necessary, you can oil your hands to make shaping easier. The size of the balls may vary from small bite-sized balls to the size of ping-pong balls. They will puff up quite a bit after baking.25 minutes or until they just start to brown on the bottom. You may have golden spots of cheese on the crust. Don’t over-bake as they will get hard and bitter.

DSC_1311

NOTE: If your dough gets too soft and sticky to shape balls, you can always add a bit more tapioca starch or pop the dough into a piping bag and pipe the dough on a baking sheet.


Additional Information from Renata:

This recipe doesn’t require a stand mixer and, traditionally, it is made by hand. This recipe does not require a stand mixer and, traditionally, it is made by hand. However, it is indeed sort of a “heavy” dough. However, it is indeed a sort of “heavy” dough. Though I have never tried using a stand mixer here, I found someone who has. Though I have never tried using a stand mixer here, I found someone who has. Her name is Raiza Costa and she blogs at Dulce Delight. Her name is Raiza Costa and she blogs at Dulce Delight. She’s a Brazilian living in the US and she makes lovely videos in English. She’s a Brazilian living in the U.S. and she makes lovely videos em Inglês. I thought I’d share her “Pão de Queijo” post (with video) with you: I thought I’d share her “Cheese Bread” post (with video) with you:
Another link to a video showing the process by hand. Another link to a video showing the process by hand. It’s in Portuguese but the method is clearly shown: It’s in Portuguese but the method is Clearly shown:
Sour manioc starch (poviho azedo) and manioc starch (also known as sweet manioc starch or poviho doce) are both extracted from yucca. The difference is that sour manioc starch undergoes a natural fermentation process. As a result, manioc starch (the sweet one) has a much finer consistency and more delicate texture than sour manioc starch.
Read more at http://leitesculinaria.com/32757/recipes-brazilian-cheese-rolls.html#Xhw8sSPoMEYCkob6.99


DSC_1316


Read Full Post »

DSC_1261

I’m drooling while writing this.  I actually had to take these and put them in the freezer or else the entire lot would be in my stomach right now. Maybe it’s because I haven’t made croissants in a few months, or that I have a deep weakness for all things buttery, or that I love pretzels, but I do know is that these are quite tasty (and dangerous).  Bread Baking Babe Heather, of Girlichef  fame, chose pretzel croissants for this months bread experience. The recipe follows the basic method for making laminated dough but in the final step you dip the unbaked, risen croissant into a bath of cold water and baking soda, giving it that dark exterior so loved in a good pretzel. I made a half batch of dough and small croissants since I know my weaknesses. Both husband and daughter happily ate one at breakfast today with an extra going into the lunchbag for her teacher.DSC_1253


A few things to take note of before starting croissants. Flavorful croissants happen over the course of a few days. Three is best for me. Read the recipe and methods entirely before starting. Back in  January of 2007, the Daring Kitchen had us make croissants. You won’t find that post here since mine were a complete failure.  Things that I stink at baking only make me keep trying.That being said, I then went and tried and retried with various recipes until one day I realized “I’ve got it”. Did I go through a lot of butter” ? Damn straight I did. Are they scary to make? not anymore. In fact, I make them at least every 3-4 months. What I learned along the way is patience. Always let the dough rest in the fridge for a day before incorporating the butter block. This develops flavor. I also add some sourdough starter as well. Again, flavor.  Let your dough rest a good hour in the fridge between turns. When you are rolling the dough and it isn’t rolling out easily, put it back in the fridge for another 10 minutes, then try again. It really does help. After the final turn, I like to put it back in the fridge overnight before shaping and baking. When proofing, I put the pan in the cold oven on the middle rack, placing a pan of hot water on the bottom rack. This creates a nice moist, warm environment for them to rise in. Thirty minutes before baking, pull the tray and pan of water out, then turn your oven to heat up to 425F. Give it the full thirty minutes to pre-heat.

For the butter block, I find it easiest to start with room temperature butter. Then  mix in the flour thoroughly.  Why add flour? Most butter (unless it’s expensive European butter) has too much water content so the flour absorbs some of this.  I then line a square pan with plastic wrap and place my butter in, using another piece of plastic wrap to push and squish it into a flat even layer. The pan then gets back in the fridge until cold and then I just pop out the plastic wrapped cold butter block. Easy.

I like Heathers method of incorporating the block into the dough. It worked great and delivered many crispy layers of goodness. The shattering shell of a deep, dark shell with a moist, feathery interior. Hungry yet? Bake On!

PRETZEL CROISSANTS

adapted from Pretzel Making at Home by Andrea Slonecker

for the dough:DSC_1250-001
1/2 cup (120 ml) lukewarm milk (~110° F)
7 g (1/4 ounce / 2-1/4 teaspoons) active dry yeast
3 tablespoons firmly packed brown sugar (golden or dark)
410 g (3-1/4 cups) unbleached all-purpose flour + more for work surface
2 teaspoons fine sea salt
1 ounce (2 tablespoons) unsalted butter, cubed, at room temp
1/2 cup (120 ml) cold pilsner-style beer ( I didn’t have any beer so I added some water)

I also added 25g of 100% starter

for the butter block:
340 g (12 ounces / 24 tablespoons) cold unsalted butter
2 tablespoons unbleached all-purpose flour

to finish:
60 grams (1/4 cup) baked baking soda (see notes)
1 egg yolk beaten with 1 tablespoon milk
coarse salt
flax or sesame seeds , optional

Stir the yeast and 1 tablespoon of the brown sugar into the lukewarm milk and allow to sit until foamy, 5 minutes or so. Whisk the flour, remaining brown sugar, and salt in a large bowl. Use your fingertips to rub the butter into the flour mixture, breaking it up into tiny flour-coated pieces the size of breadcrumbs. Stir in the yeast mixture and the beer using a wooden spoon or rubber spatula to form a shaggy mass.
Turn the dough out onto an unfloured work surface and knead eight to ten times, until all of the flour is just incorporated. You don’t want to over work it, because you don’t want the butter to melt too much. The dough will not be a smooth mass; you will see some flecks of butter. It should be soft and tacky, but not sticky. Adjust as needed with flour or water. Lightly oil a large bowl and set the dough into it. Cover with plastic wrap. Place in refrigerator for 8 to 24 hours (24 will give you the best flavor).
making the butter block
Beat the butter and flour together in the bowl of a stand mixer, using the paddle attachment until it forms a smooth mass (or by hand, using a lot of elbow grease). This should take about a minute. You want the butter to be pliable without beating air into it or melting it.

Spread the butter between 2 large sheets of plastic wrap (or parchment or wax paper), and use a rolling pin to shape into a rectangle that is about 8″x9″. Use a straight edge to form corners, but work quickly as you want the butter to stay cool. Wrap in plastic and refrigerate until you’re ready to roll out the dough.April 28 2014

Scatter a little bit of flour on your work surface, then turn the dough out onto it. Roll it out into a rectangle that is 10″x15″ and about 1/4″ thick. Using your hands, gently pull and stretch the dough to form straight edges and sharp corners. Brush excess flour off of the dough. Set the dough with a long edge facing you.
Mentally divide the dough into 3 equal portions. Place the butter block over the right 2/3 of the dough, leaving a 1″ border on the outer edges. Fold the empty left portion of the dough over the middle third. Now, lift and fold the right section of dough over that. You should have 3 layers of dough that encase 2 layers of butter. Pinch the outsides and the seams together and lightly press the layers together using a rolling pin. This completes the first turn. Wrap in plastic and refrigerate for 1 hour.
Remove the dough from the fridge and set it on your lightly floured work surface. Roll dough out into a 10″x20″ rectangle, pulling and stretching to form straight edges and sharp corners. Brush off any excess flour. Set the dough with a long edge facing you. Fold both of the short ends in to the center, leaving a 1/4″ gap where they meet (think of a book jacket). Fold one side of the dough over the other. Lightly press the layers together using a rolling pin, and square and sharpen the edges and corners. This completes the second turn. Wrap in plastic and refrigerate for 1 hourApril 28 20141

3rd (and final) turn:
Lightly dust your work surface and the top of the dough with flour. Roll dough out into a 10″ by 15″ rectangle. Do another trifold, as done in the first turn (mentally divide into thirds, then fold one third over the center, followed by the last third). Square the edges and sharpen the sides; wipe off excess flour. Wrap in plastic and refrigerate for at least 2 hours, but up to another 24 hours.
At this point, you can wrap the dough tightly in plastic wrap, slide it into a freezer baggie, and freeze for up to 1 week. Defrost overnight in the refrigerator before proceeding to final shaping.DSC_1234

final shaping:
Line two rimmed baking sheets with parchment paper and set aside.
Lightly dust your work surface and top of your dough with flour. Roll out into a 15″x18″ rectangle that is ~1/4″ thick. Pull and stretch to form straight edges and sharp corners. Patch any holes where butter may have popped through by dusting them with flour. Brush any excess flour off the dough.
Heathers method: Cut the rectangle in half lengthwise, creating two 15″x9″ sheets of dough. Using a pizza cutter or bench scraper, cut each piece of dough into three equal strips, the short way. Then cut each strip in half diagonally, so that you left with 6 triangles. Repeat with other piece of dough.DSC_1243

Me: For shaping I  have cardboard template that I made last year and just keep in my drawer until needed. It is 3 inches wide at the base and 5 inches long. I find it so easy to make consistently even shaped croissants.
If  you like, cut a 1/2″ notch in the center of each triangle base, then beginning at that end, roll the triangles up, tugging on the tip to elongate it slightly, then gently pressing it into the dough. Place on the prepared baking sheets with the tip tucked under, and curve the ends to form crescent shapes (the notch helps with the curving process). If you prefer a “straight” croissant, the notch isn’t necessary. Either way, it won’t hurt anything.
Cover the croissants with damp, clean kitchen towels and allow to rise at cool room temperature until they have almost doubled in size and feel spongy, ~2 hours.
At this point, slide the croissants into the refrigerator for 20 minutes while you prepare the dipping solution. Preheat oven to 425° F, positioning one rack in the upper third of the oven, and one in the lower third.
prepare the dipping solution:BBBuddy Badge April 2014
Add the baked baking soda in 8 cups of cold water and stir until completely dissolved. One by one, dip the croissant dough into the dipping solution, allow the excess to drip off, then set back on the lined trays. Brush the tops with the egg wash, then sprinkle with coarse salt and sesame seeds or poppy seeds, if using
Slide into preheated oven immediately and bake for 15-18 minutes (rotating pans from front to back and top to bottom halfway through), until they are deeply browned, crispy, and flaky. They should feel light and airy if you pick them up.
Transfer to a wire rack to cool for 10 minutes before serving (or let them sit on the sheet tray for 5-10 minutes. I found that they soaked the butter on the pan back into them if I did this). They are best enjoyed the day they are made, ideally warm from the oven. Store any extras in a paper bag for a day. You can reheat them by placing them in a 350° F oven for ~5 minutes.
to make Baked Baking Soda:
Baked baking soda is an alternative to working with lye that still lends pretzels their dark, burnished crust. To make the baked baking soda, spread 1/4 cup (~70 grams) of baking soda out on a baking tray lined with parchment paper or foil (or in a pie pan). It will decrease in weight, but shouldn’t decrease in volume. Slide it into an oven that has been preheated to 250° F/120° C and bake for 1 hour. Cool completely, then store in an airtight container at room temperature. If you see lots of pretzels in your future, make a large batch to store since it keeps indefinitelyDSC_1257

Please make sure to visit the real babes to get a visual feast

Read Full Post »

Older Posts »